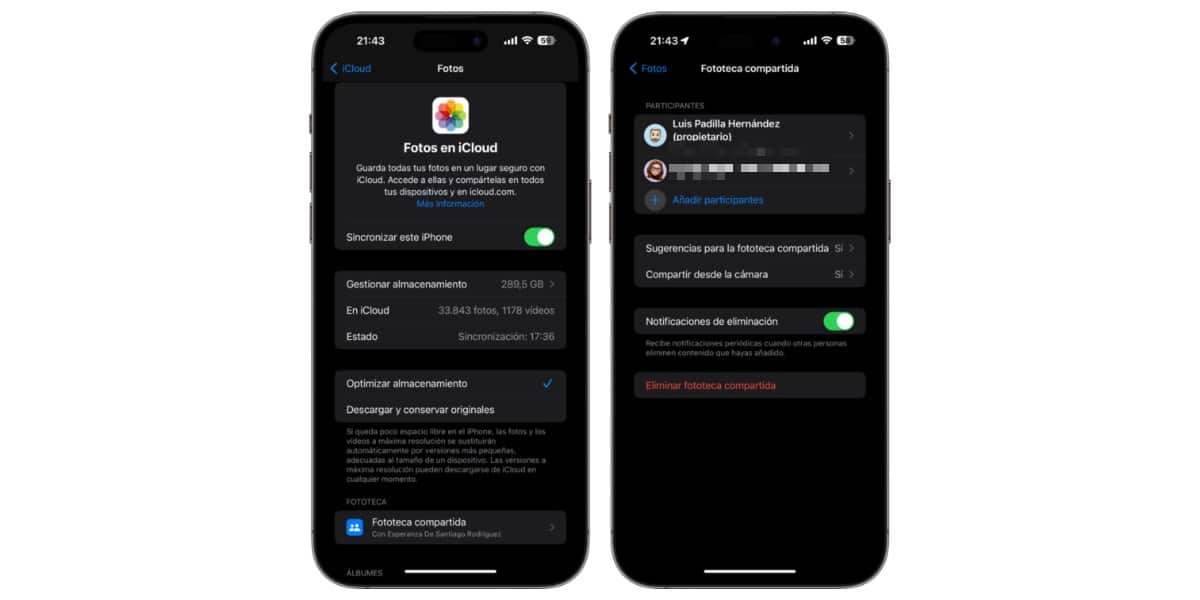
iOS 16 includes a novelty that we have been waiting for a long time: the Shared Photo Library. We can now share all our photos with other people, and all can add or delete. That's how it's set up and that's how it works.
Set Up Shared Photo Library
To set up the Shared Photo Library you need be updated to iOS 16.1 on your iPhone or iPadOS 16 on your iPad. Those with whom you share your library will need to be updated to these versions as well. In the case of macOS you need be updated to macOS Ventura. Another requirement is that have the photos synced with iCloud. You won't be able to share your library if your photos aren't stored in the Apple cloud. If you want to use this functionality and you don't have enough space in iCloud, you will have to expand the space by paying for 50GB, 200GB or 2TB and sync your photos. Once they are uploaded to iCloud you can use the Shared Photo Library option.

On your iPhone or iPad access the device settings, tap on your account and access iCloud> Photos. At the bottom of the screen you will find the Shared Photo Library option. There you can activate it and configure who you want to have access to it. You can share it with up to 6 people in total. On the Mac you must access the same menu within the settings of the Photos application, in the "Shared Photo Library" tab.
How Shared Photo Library works
You can share the Photo Library with five other people to make a total of six people with access to that photo library. Anyone with access will be able to add, delete, and edit photos. Which photos you share is up to you, it can be from all your photos to just a few, it is your decision when configuring the Shared Photo Library. Of course, keep in mind that you can only have one. Photos you share only take up space in the organizer's iCloud account from the photo library

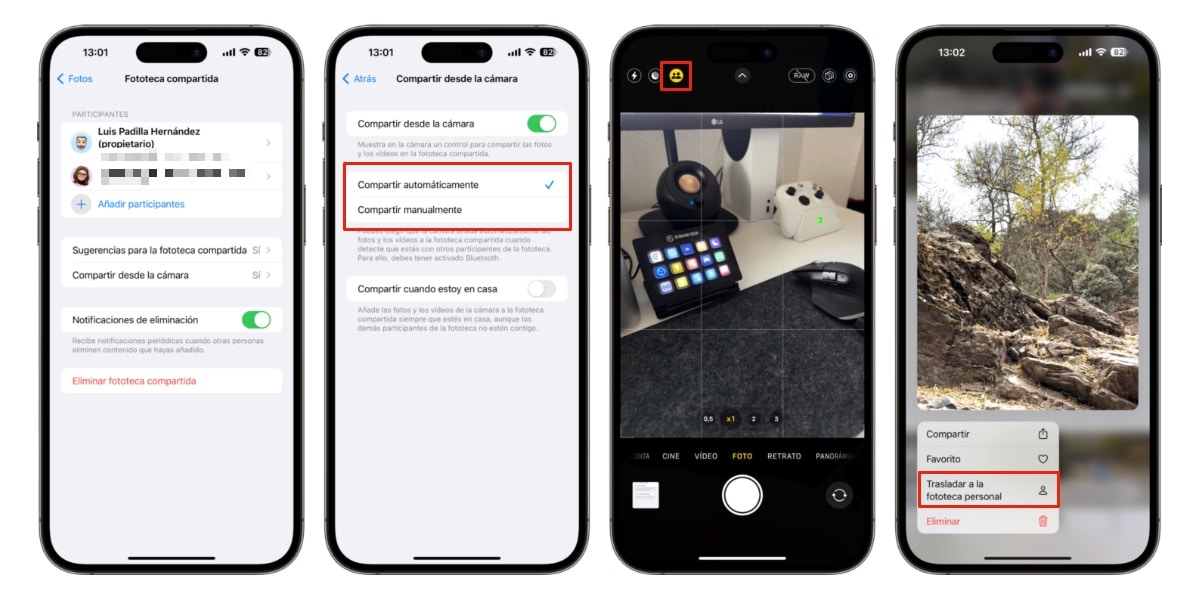
Once you've shared your Photo Library, you can toggle in the Photos app whether you want to see your personal or shared library. You can continue adding photos to the shared one if you wish, you can even do it automatically if you prefer. You have the settings for this function within the Settings of your iPhone and iPad, in the section dedicated to the Photos application. You can also choose in the camera where you want the photos you are going to take to be saved, for which you must click on the icon at the top of the screen with silhouettes of people. if it is activated in yellow, the photos will go to the shared photo library, if they are crossed out in black and white, they will go to the personal library. Within the Photos application you can also move images from one photo library to another by holding down on the photo to bring up the contextual menu.
Apple TV and iCloud.com
We've been talking about iPhone, iPad, and Mac all along, but what about Apple TV and iCloud on the web? While you can't set up any of these features on Apple TV or iCloud on the web, you can. you can see the photos from the Shared Photo Library.