
The speed with which we surf the internet does not only depend on our contracted speed. Surely many of you understand why you have 100MB (or I instill more) and yet the loading of web pages is not as fast as it should be. We have already told you how to improve the connection of your devices to the WiFi network of your house, which is essential, but there are also other important details that can improve browsing speed, and this time we are going to talk about one of the most important: DNS. What are DNS? Is it worth changing the DNS? We explain everything below.
DNS is a fundamental translator
When we connect to a web page, for example Google, we all write "www.google.es" in the face of the address, however the real address of that page is "216.58.210.163". The DNS do precisely that, they are in charge of associating each domain with its real address, so that we do not have to memorize those unintelligible numerical sequences and be able to use their domains, that is, the names of the webs. It is easy to understand therefore that Depending on how fast our DNS server is, we can reach the web pages we want to visit earlier or later..
Why change DNS?
Our internet provider has DNS configured by default. Sometimes they are good servers that give us a good connection speed, but sometimes not. If you think that your pages take a long time to load, you could try changing your provider's DNS for others that are known to be optimal, such as Google's.
Ideally, change the DNS directly on the routerSo that any device that connects to your network uses these new DNS, but as most providers "enable" that option, we are going to explain how to change them from the device itself.
How to change DNS on iOS (iPhone and iPad)
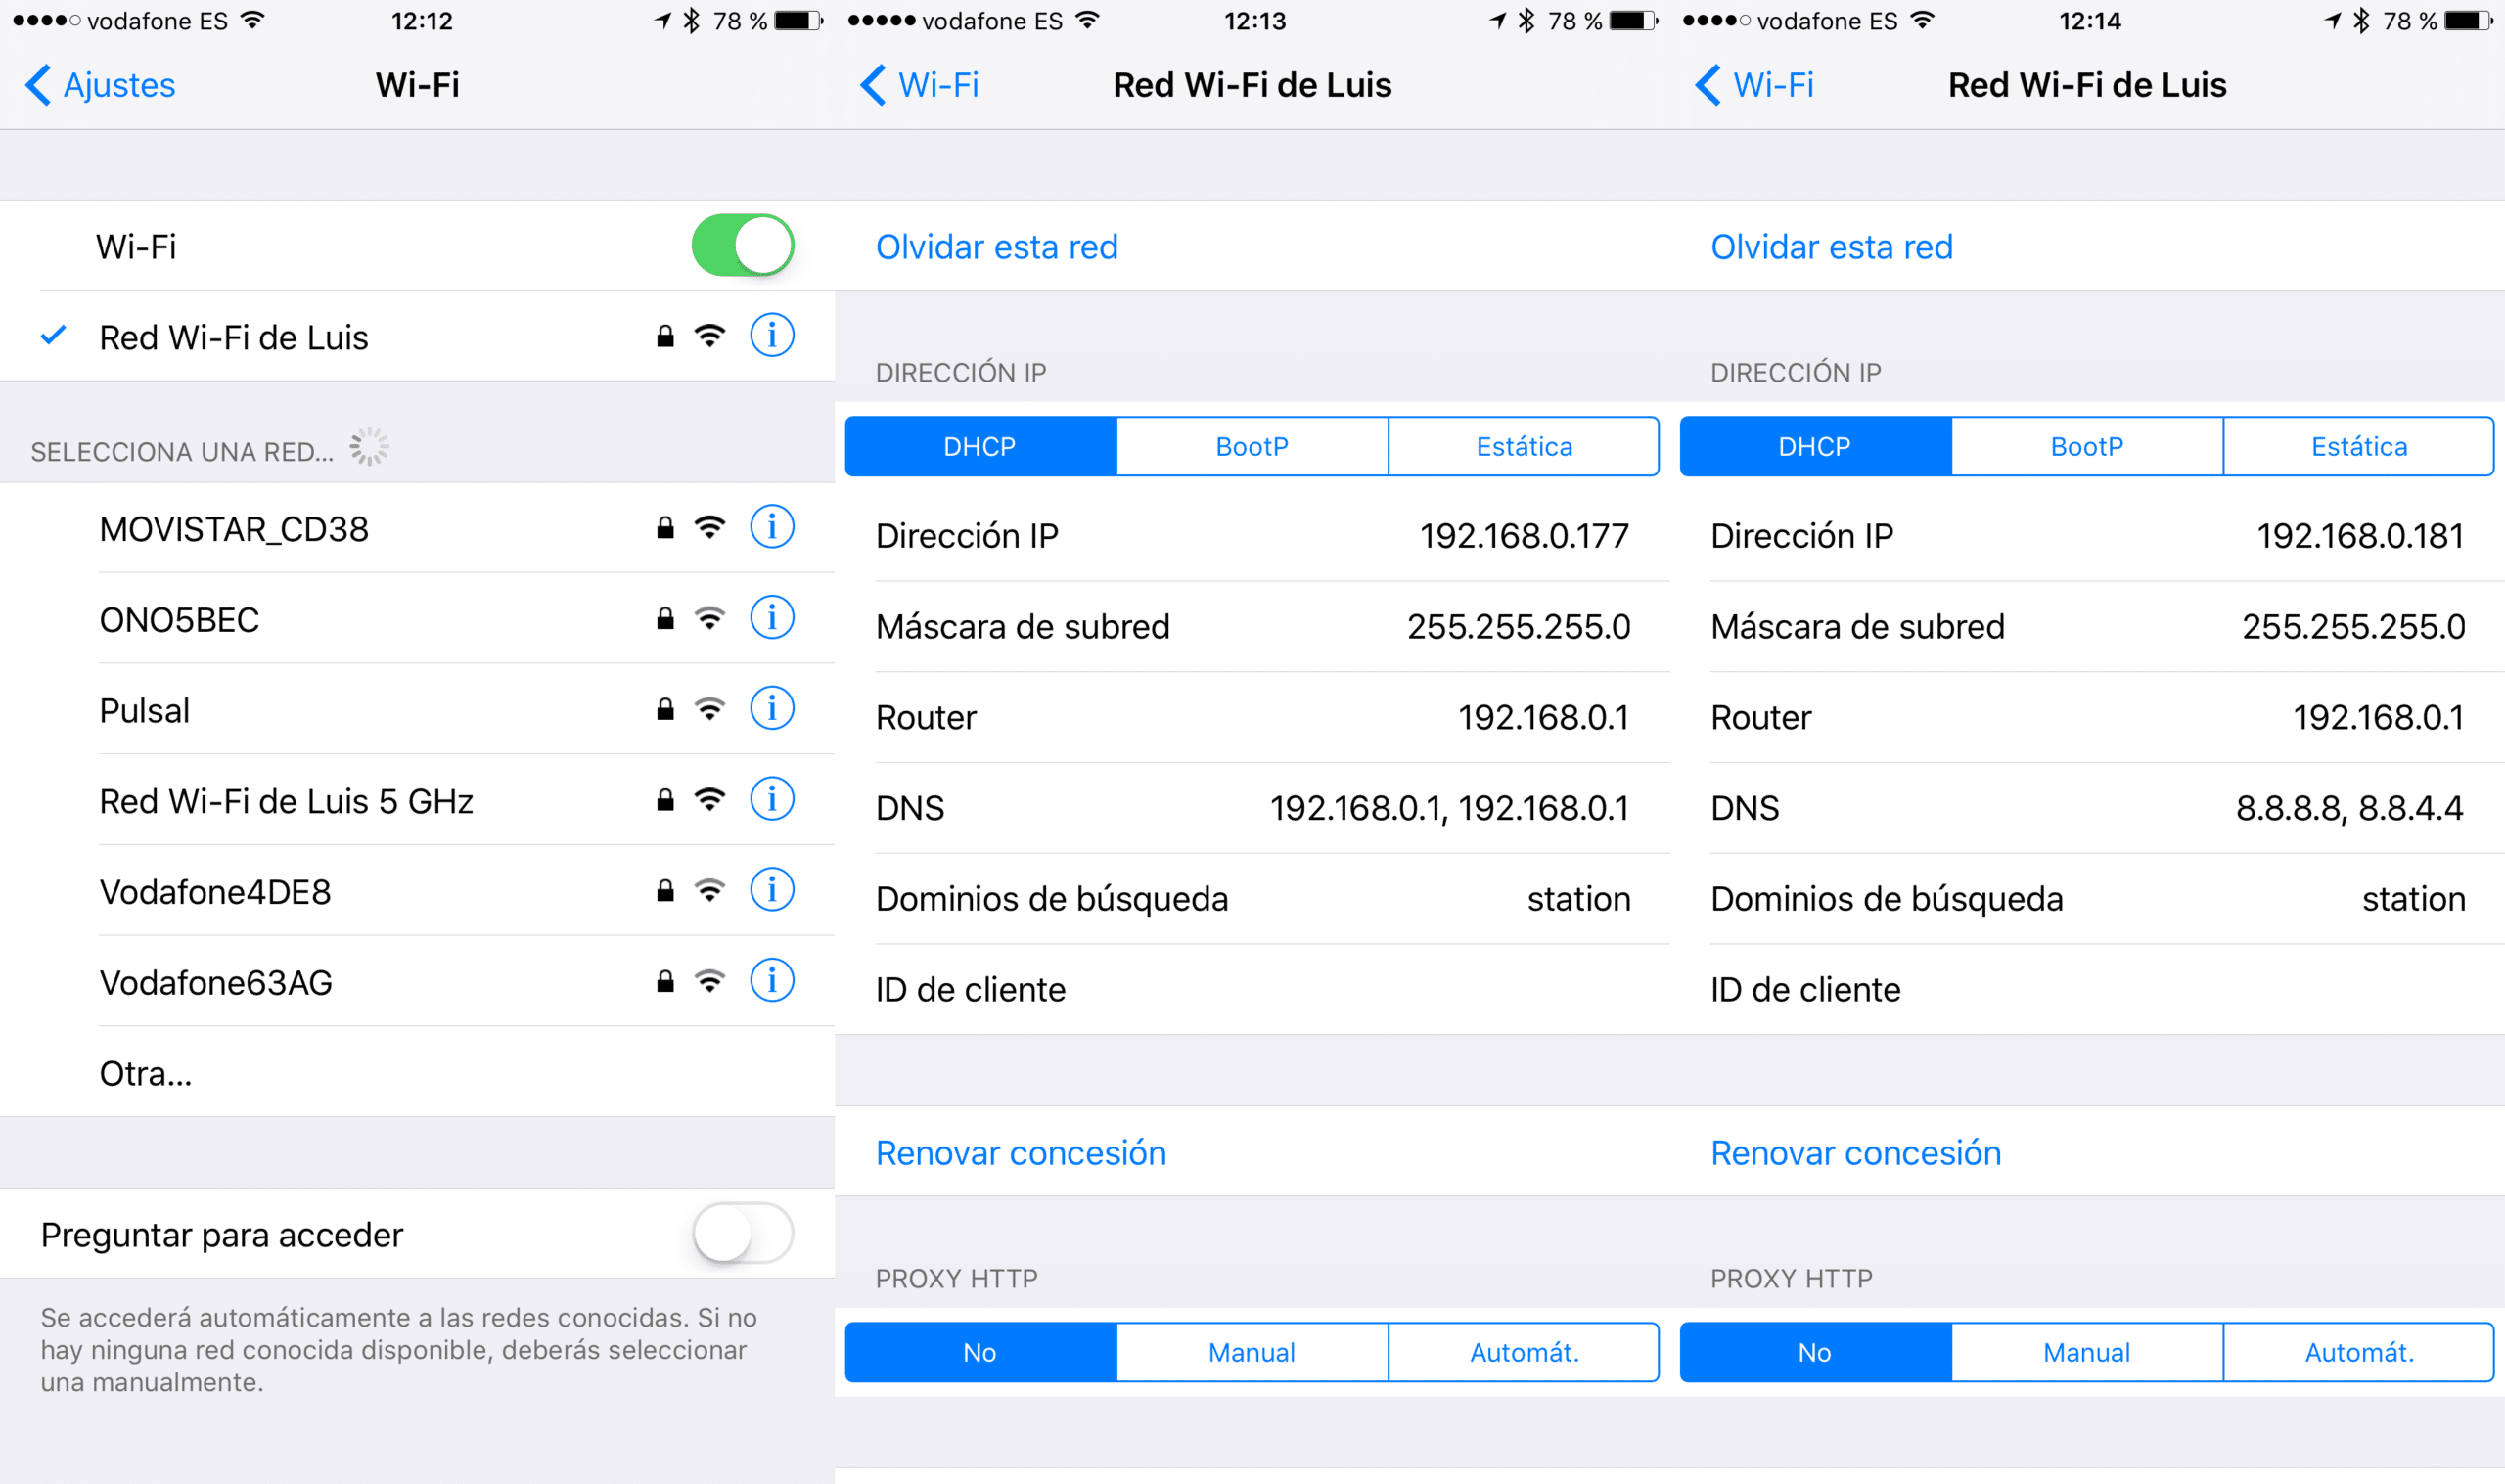
To change the DNS in iOS you must go to the Settings of the device, and in the Wi-Fi section click on the "i" to the right of the network to which you are connected. Once inside the network details, change the DNS that appear by default for the ones you want to add (In our example I have added Google's: 8.8.8.8, 8.8.4.4). As simple as that.
How to change DNS in OS X
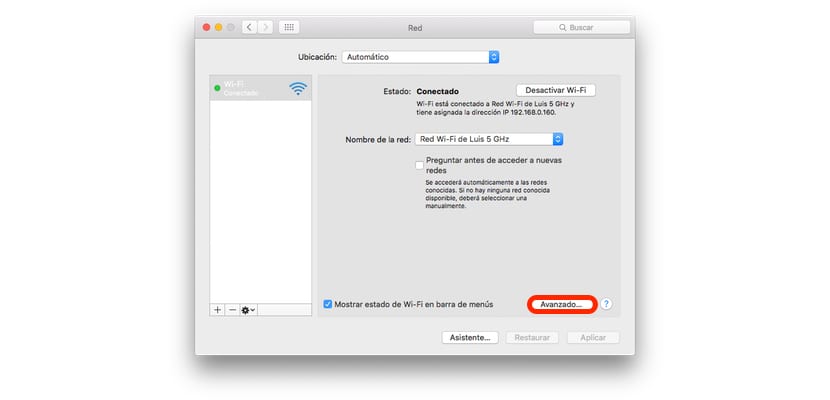
On OS X the process is less straightforward, but just as simple. Go to System Preferences> Network in the Advanced section go to the DNS tab.
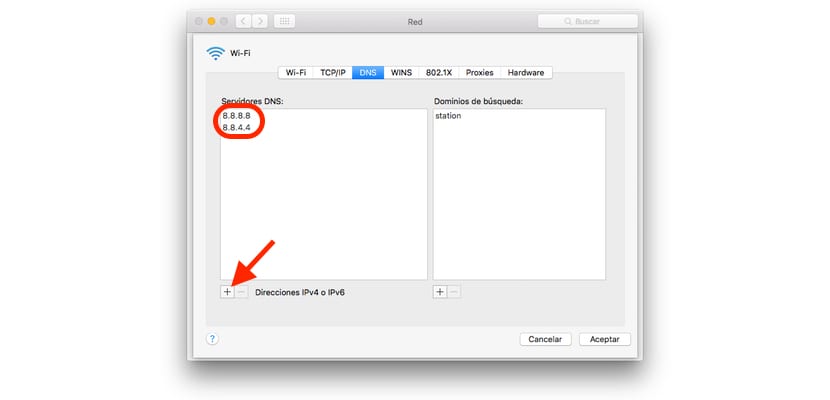
At the bottom of the window you will see a "+", click on it and add the DNS you want (in our example, again I have chosen Google. Click OK and then Apply. After a few seconds everything will be perfectly configured.

And what is the search domain for? You put "station" but what's the use?