The iOS Home app is increasingly complete and functional, this is the way in which Apple intends for us to enter the vice of purchasing smart home products, especially those that have the seal of: Compatible with HomeKit from the likes of IKEA, Philips Que and LIFX. However, when we already manage a good number of connected devices in the home, the Home application can be a real Chaos. Today I want to teach you everything you need to know about the iOS Home application and thus be able to customize its images, icons and habituations, let's go there with this tutorial.
How to activate, deactivate and use our HomeKit devices
It will not have taken you long to realize that Casa for iOS does not have a Widget, it is one of the few native applications that does not have such interesting shortcuts. However, this is because, in reality, House has an icon available in the Control Center, to add it and open the drop-down of home shortcuts without having to enter the application we simply have to go to Settings> Control Center> Customize controls and here we are going to add the Home icon.
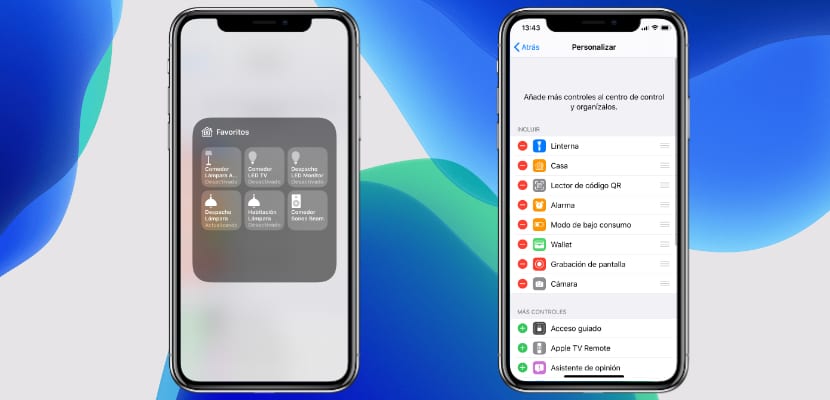
Since then The drop-down of our favorite devices will open, up to 9 to be more specific. Pressing them we will turn them on and off, but we do make a Long press 3D Touch opens extended controls that allow us to choose colors and intensity. Here we have an icon of a cogwheel at the bottom that if we press it takes us directly to the settings of that device to be able to rename and customize it. In the same way that from the Control Center if we click on the House icon in the drop-down, it takes us directly to the application in its full version.
How to personalize our House with HomeKit
Once we open the iOS Home application we have the "edit" button located at the top right of the screen. If we give it and click on the name of our house, a new tab will open that will allow us to edit the general characteristics of our "House" in iOS, however, we must remember that we can click on «Add house», since we can control as many houses as we want. In this customization tab we will be able to carry out all the following customization actions:
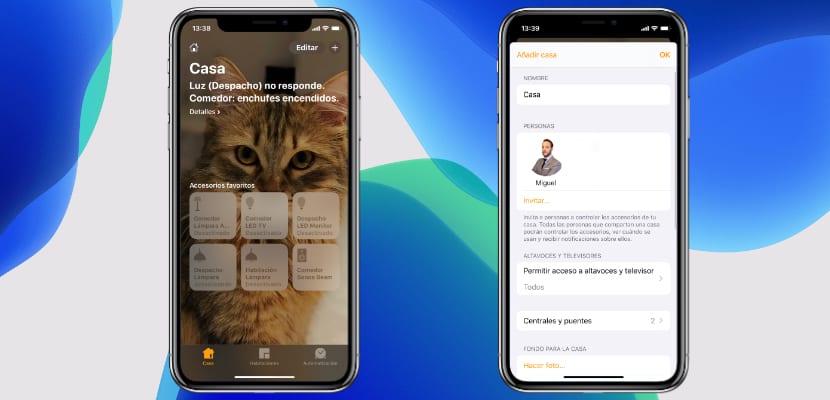
- Rename the House and put the one we want
- Invite iOS users to control our House from your iOS device
- Manage access to speakers and television for people who connect to WiFi as well as password to our speakers and televisions
- Manage accessory centers and connecting bridges in each house
- Choosing a background for the house selecting a photo from our library or taking it directly
- Add notes to the house so that everyone can read them if they access it
- Delete a House, and therefore all connected HomeKit devices will be unlinked
How to create and customize rooms
Ideally, we have the HomeKit devices ordered by habitations, so we will be able to manage them faster and know at all times where they are. To do this, click on the "Rooms" tab, and before linking any HomeKit product, click on "+" to create rooms. Once we have them created we will be able to click on the «Edit» button to customize them one by one, I recommend that you take a photograph of each room and use it in the background to identify it faster. If we click on "Edit" and choose the room we can:
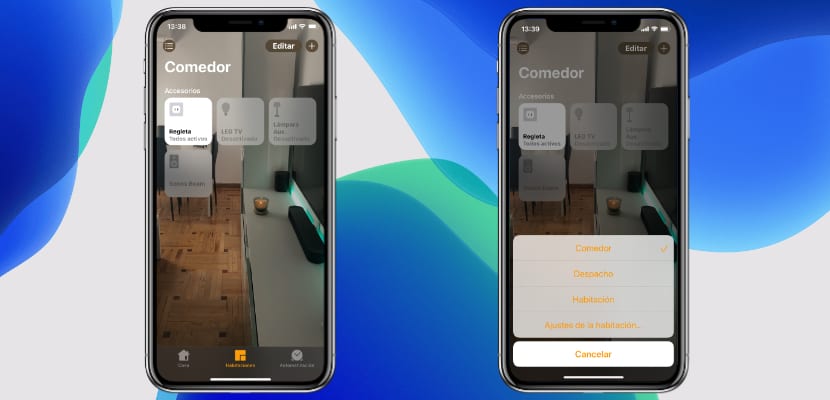
- Choose the name concrete of the selected room
- Assign an area (set of rooms) in case we differentiate floors or sectors of the house
- Choose a background or take a photo to assign it
- Delete every room
When we link a HomeKit device, it will ask us if we want to assign it to a specific room. This We can change it whenever we want, we just have to press "Edit", choose the device and within the "Room" option select the one we want. That is how easy we can assign the accessory we want to each room and have them perfectly arranged so that we and everyone who has access can identify them in the Home application.
How to Customize All HomeKit Devices at Home
How could it be otherwise, icons and customization take on a lot of relevance in an application like Home. By default each device will get a name and an icon, but we will be able to adjust this when we see fit and it is also very easy. To do this simply we have to click inside the Home application on "Edit" and choose the device, then its adjustment menu will open where we can:

- Rename it the one we want
- Choose the room where it works
- Include it in «Favorites»: This will make it appear in the Control Center and in the home tab of the Home application
- Choose the environment in which it works
- Remove the accessory
- Change accessory icon: To do this, click next to the name on the icon and a drop-down will open with all that can be selected according to the type of product
- Group accessories: So that several turn on and off at the same time if we do it in one of them
These are the main features that we can customize in the iOS Home application to identify our devices quickly.
How to create and use the «Environments» and «Automation» in the Home application
Finally we are going to differentiate between «Automation» and «Environments» at Home with HomeKit:
- Environments: A series of custom activations and deactivations that we create so that the devices run according to our needs, for example, we can create an environment of low lights, volume increase and colored light to watch a movie.
- Automatisms: In this section we can simply establish a setting so that at certain times some functions that we want are executed, for example, that at 07:00 AM every day the lighting turns on slightly to wake us up.
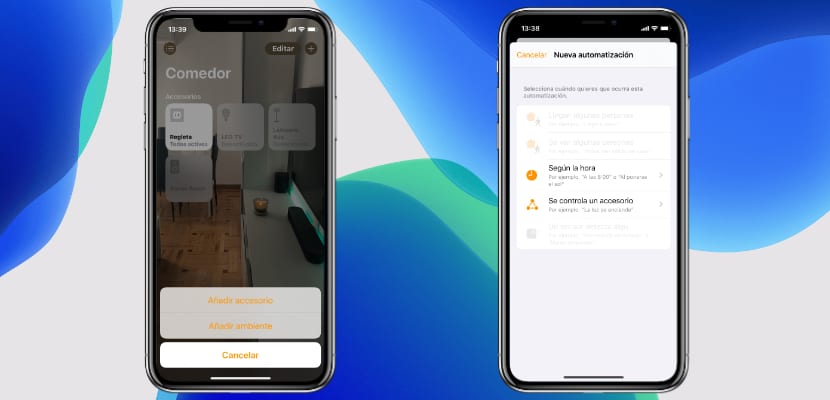
We can manage the automatisms according to:
- If someone arrives or leaves by geopositioning the user
- According to the specific time of day
- Depending on whether we turn on or off a specific accessory (For example, if we turn on the kitchen bulb, the laundry bulb will also turn on)
- Depending on whether any of the sensors detects an activation
If you have your own tricks or any questions, do not hesitate to stop by our Telegram channel or leave us what you want written in the comment box.