
Apple recently introduced news in the way we can install applications on iOS devices and Apple TV. Now it is quite easy to install applications that are not in the App Store and it is not even necessary to pay for a developer account to do so. Thanks to the huge number of open source projects that are available on GitHub and Xcode, we can install applications such as emulators or internet browsers they could never make it to the App Store, and of course you don't need to have the jailbreak done. We give you all the details below.
The inexhaustible source of applications
GitHub is an application powerhouse for iOs and tvOS. We have already explained two examples of how to install applications from this repository: Provenance, the SEGA and Nintendo video game emulator for the new Apple TV, and the Safari browser for tvOS. But these are just two examples of what can be done thanks to the huge developer community behind GitHub. Do you want to know everything that is available for iOS or tvOS? It is easy, You just have to do a search on the page or directly click on these two links that will give you the results of applications according to the date of the last update.
Using Xcode to create our applications
We can't really say it's "build" apps, because they're already made on GitHub, lThe only thing we have to do is sign them with our developer account so that we can install it on our device. It is a very simple procedure that is also always the same, so that once you have done it a couple of times it will be completely automatic for you.
Requirements
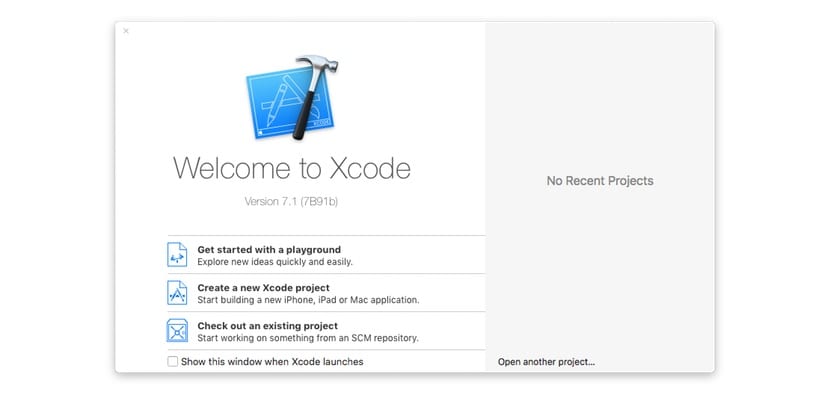
- Xcode 7, a free application that you can find in the Mac App Store.
- Developer account, which can be free, you do not need to pay the annual fee. You can create one from the Apple's official website.
- A USB-lightning cable for iPhone or iPad, or USB-C for Apple TV.
- The source of the application that you found on GitHub.
Procedure
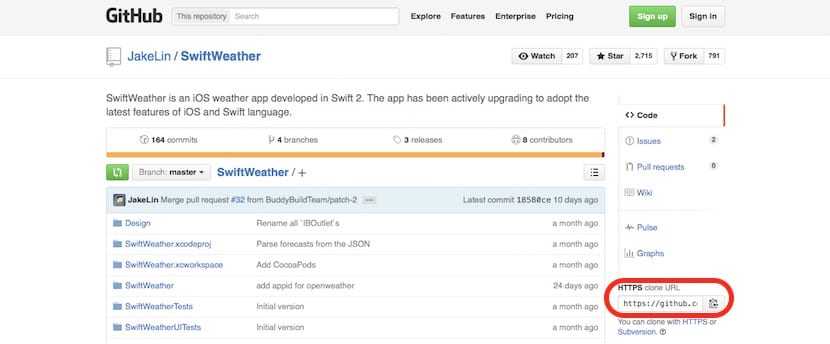
The first step is get project url to add to xcode. We choose the application we want to install (in the example I have decided on this simple weather application) and on the right side of the screen we will find the URL that we must copy to the clipboard. You can select it and copy it by clicking on the small icon on the right.
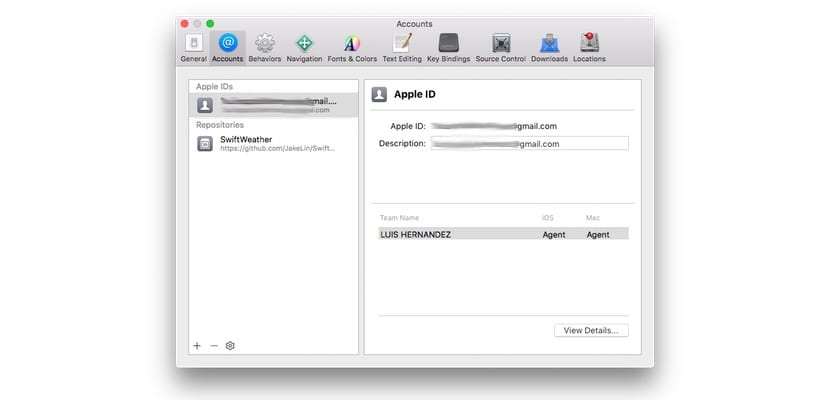
We open Xcode, and if we have not yet added our account it is time to do it now. To do this, we go to the "Preferences> Accounts" menu and enter the data of our Apple ID with which we register in the Apple developer program. I insist, you don't have to pay anything.
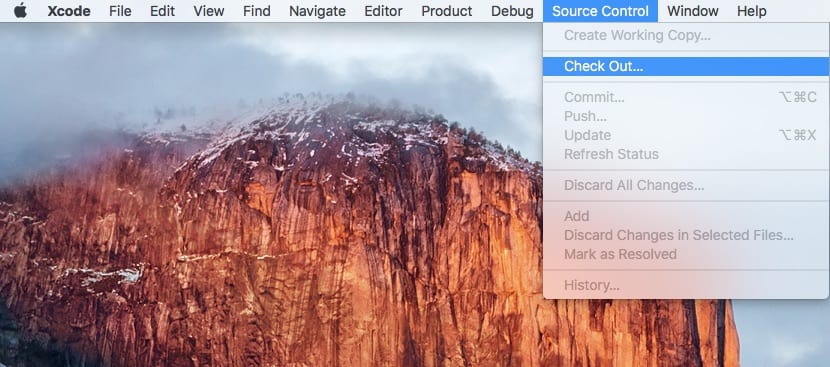
Since we have our account added to Xcode, it is time to start the application signing process. In the upper bar we select "Source Control> Check Out".
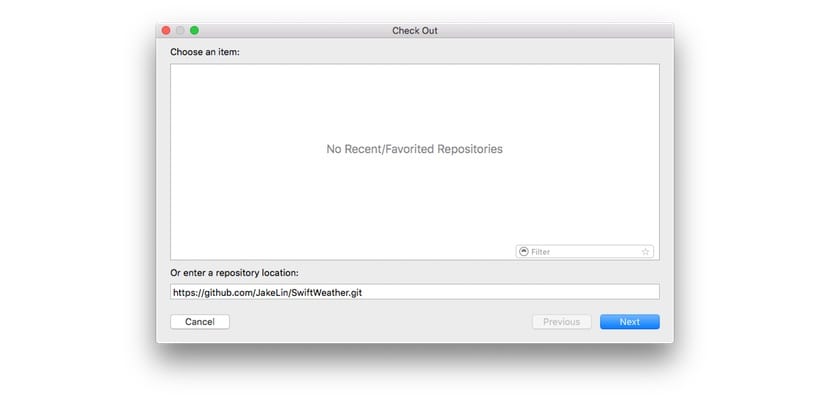
In the window that appears, in the box at the bottom, we paste the address that we have copied before, and click on «Next»
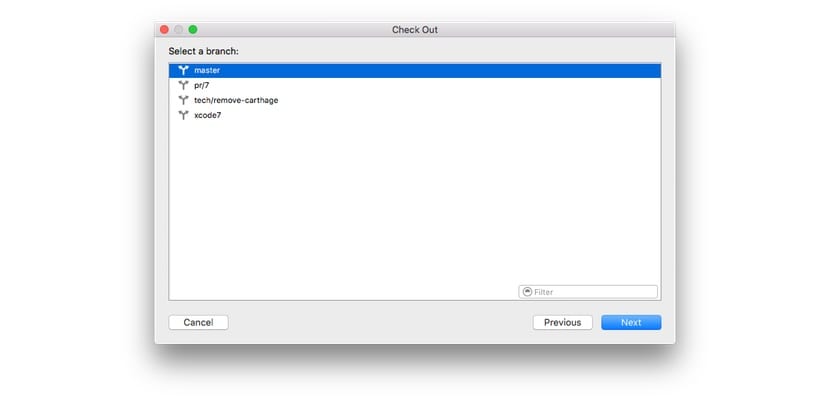
After a few seconds of downloading content, the following window will appear. We select «master» and click on «Next»
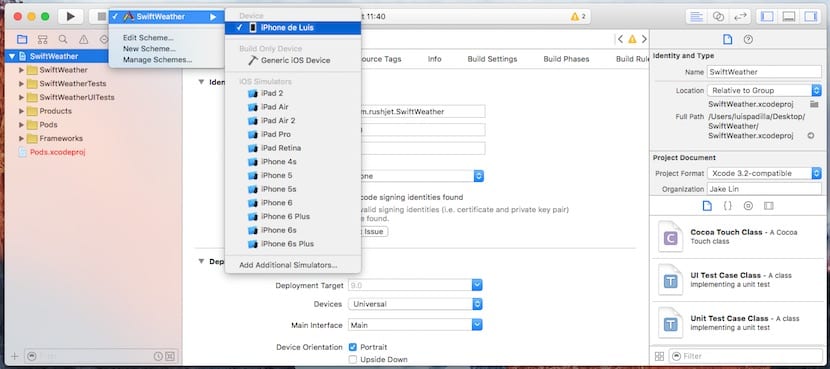
Once the application processing has finished, which can take from a few seconds to more than half an hour, depending on the application, when the "Ready" label appears at the top of the window, we can install it on our device . In this case, as it is an application for iPhone, I connect my iPhone to the computer using the USB-lightning cable, and I select it as it appears in the image above. Once that is done, click on Play, the button with the black triangle in the upper left, and the application will be installed on our iPhone (in this example). If you want to see a video example, here you can see the procedure for creating and installing Provenance, the console emulator for tvOS.
A very important detail to keep in mind is that Xcode and iOS (or tvOS) version must be compatible. Apple usually updates Xcode for each version, or at least for the betas, so if you have a beta installed on your device and Xcode does not have it beta, it is likely that it will not allow you to install the application.
Caution with what you install
A little common sense: GitHub is not controlled by Apple, and the application does not go through the filters of the App Store, so be very careful what you install. It is better that you always inform yourself of the application before so that you do not get unpleasant surprises. Right now the limit is up to you, and that is a responsibility that you must assume.
NOTE: the application used in this example has only been used for this purpose. This particular application does not work using this method as it has other dependencies that are not relevant for this tutorial.

Could you make a car so that we can see how the mame emulator is installed on the apple tv 4?
At the moment it does not work well. But I'll do it as soon as everything is correct.
Does this method allow you to create the apps yourself in Xcode? Or is it that the source code of the Apps created that are downloaded from GitHub have something special? Thanks!!
In GitHub they are already made, you just have to sign and install them on your device
Kg1020