
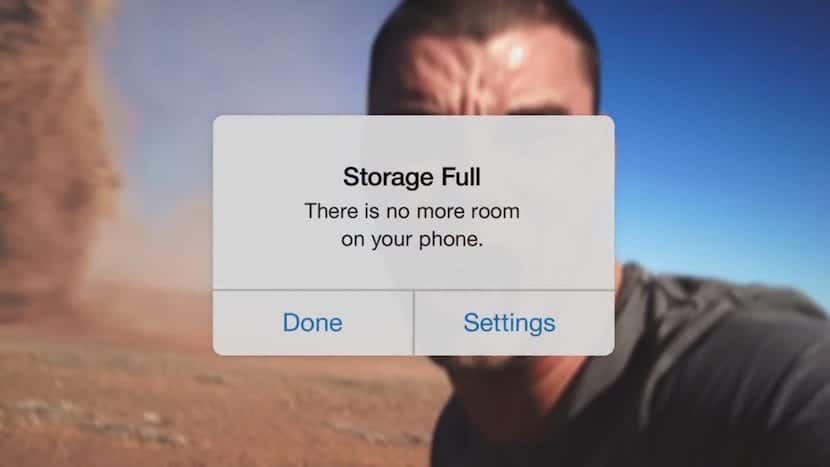
The launch of the iPhone 7 was the end of the devices that the company launched with 16 GB, a storage space that left almost no room for maneuver for users who purchased this model. Fortunately, all the models that Apple offers, both in the iPhone range and in the iPad range offer 32 GB of storage, a space with which we can do much more than with half the space, space that was never real because once discount the space occupied by the operating system we barely had a little more than 11 GB left.
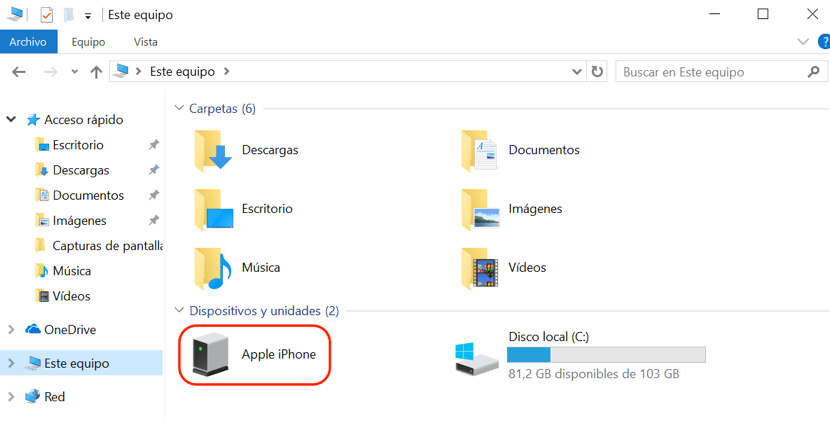
As we make use of our device, either by installing applications or recording videos and taking photos, the space is reduced so that we are forced to connect it to our computer, either PC or Mac to empty the device and, incidentally , back up photos and videos that we have made so far. When connecting our iPhone, iPad or iPod touch to our computer, we must bear in mind that the methods to be able to extract the content that we have stored is different in both operating systems, always obtaining the same result in the end.
Methods to transfer photos from iPhone to Mac

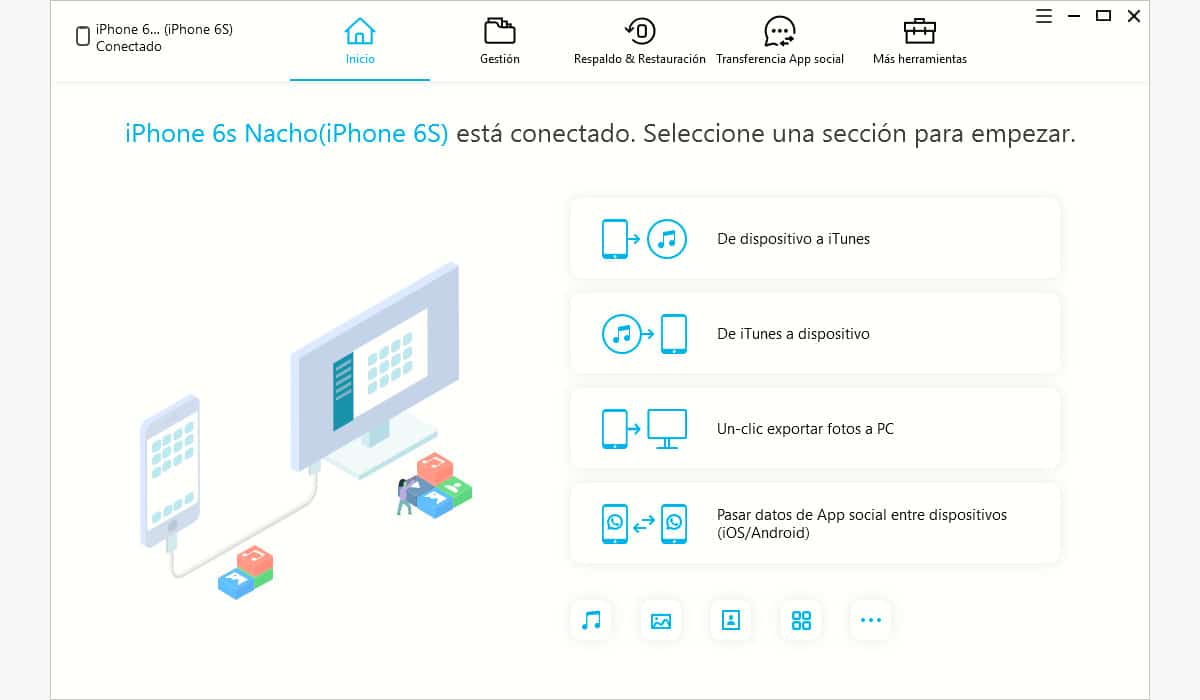
Tenorshare iCareFone
iCareFone is one of the most complete software that we can find today to extract the images and videos from our iPhone, iPad or iPod touchIf we don't want to complicate our lives with the different options that both macOS offers us natively, as well as Windows, with methods that are too complex and not very intuitive.
The solution that Tenorshare offers us through iCarePhone allows us in addition to quickly transfer our images and videos from an iOS device to a computer, the possibility to pass this type of content from iTunes to our device or vice versa, although in that article we are going to focus on the first option that I have discussed.
Pass the photographs of our iPhone, iPad or iPod touch with the Tenorshare iCareFone program it is a very simple and fast process, process that we detail below.
First of all, once we have opened the application, we must connect our iPhone, iPad or iPod touch to the computer. If on the screen of the device, you ask us if we want to give permission to the computer so that it can access its content, click on Trust, since otherwise, the device will not be able to connect with the computer, and therefore the application that We are going to use.
Next, click on the option One-click export photos to PC. At this time, the application will export all the images and videos that we have stored on our iPhone, iPad or iPod touch, without us having to select which images we want to export.
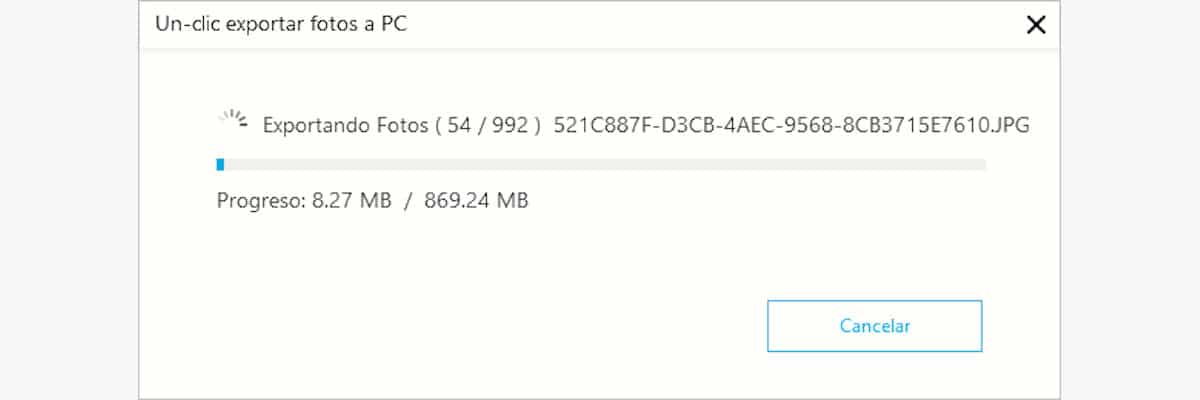
Once the process is finished, a new window will automatically open where the folder where all the images are located will be displayed that we have extracted from our device. Next, we must proceed according to our needs: share them with our friends, copy to an external hard drive to have a backup ...
Skip only selected images
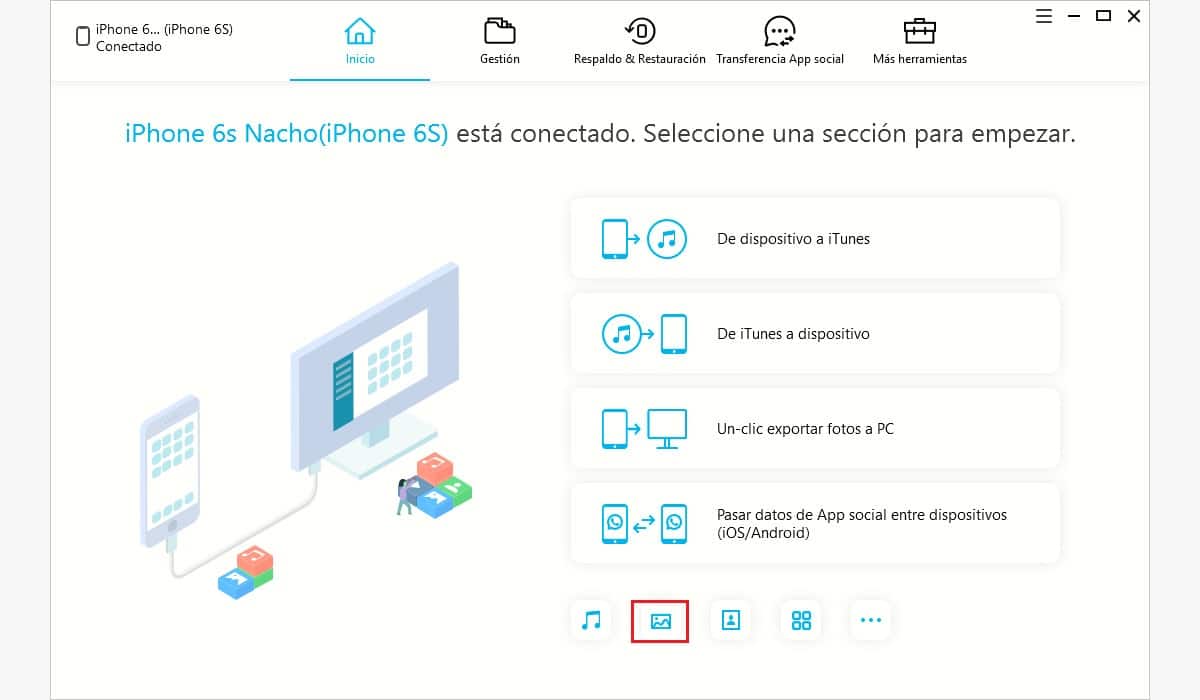
The previous method is not the only one that iCareFone offers us, since in addition, we can also copy a limited number of images from your iPhone to your computer. To do this, we must click on the second icon that is at the bottom of the application and that represents an image.
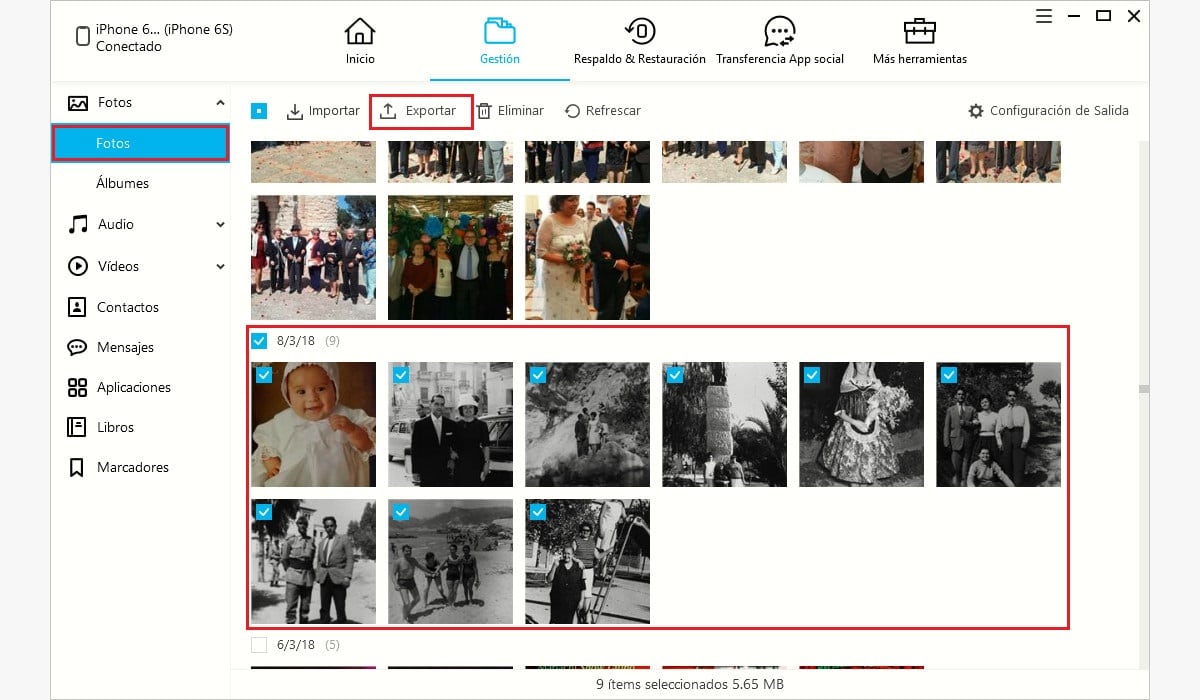
Next, in the left column, we select Photos so that in the right column all the photos stored on the device are displayed. In the next step we have to select one by one, the images that we want to extract from our iPhone and click on the button Export. Finally we must select in which directory we want to store the images that we are going to extract from our iPhone.
Tenorshare iCareFone is available for both Windows as for macOS.
Application Photos

Apple has tried to make this task as easy as possible by integrating the Photos application into the operating system, an application that is responsible for accessing our device and extract the content in images and video that we have created copying it in the application in a way that many users may find it funny, since physically it does not give us access to all the files to be able to copy, move or delete them according to our priorities. We will solve this problem a little later.
In a native way, every time we connect our iPhone, iPad or iPod touch to the Mac, the Photos application automatically opens, showing the latest photos we have taken along with the latest videos. To extract the images that we want to store independently or that are automatically saved in the application we must select them and then press on the key Import selection (1), located in the upper right part of the application. In addition, if by the way we want them to be deleted once we have passed them to our Mac we must check the box Delete items after import (2).
We can also select the Import new option (3), so that the Photos application of our Mac, automatically takes charge of downloading all the photographs that we have taken on our device since the last time we connected it. If we have never connected it to the Photos application, the application will import all the photos and videos available on our iPhone, iPad or iPod touch.
To facilitate this task We can go to the Albums section (4), located in the right column where all the different albums that have been created by both the application (People, Places, Selfies ...) and those that we have been able to create on our device can be found.
When the import process is complete, all images will be displayed in the Albums section under the Last Import title. Once we stop using the application and close it, automatically the application will begin to classify the images by People, Places, Videos, Screenshots ... (5).
Where are the photos that we import into the Photos application on our Mac stored?
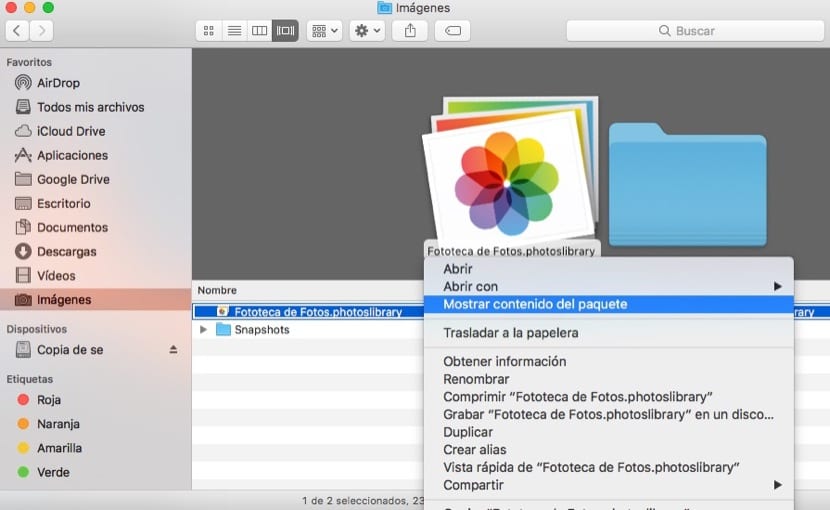
Well, now we have the photos and videos on our Mac within the Photos application, but Where have they been? To be able to access the photos and videos that we have extracted from our iPhone, iPad or iPod touch we must go to the Finder and click on Images and do not place it in the right section, just above Photo Library .photolibrary and click on the right button and select Show package content. In the new window that will be displayed we will find our photos within the Masters directory, classified by years and months.

Screenshot
The Image Capture application not only allows us to extract images and videos from our device, but also allows us to obtain images from cameras, video cameras or scanning devices that are connected to the Mac. This app is missing from the macOS Dock, so we must access it through Launchpad> Others.
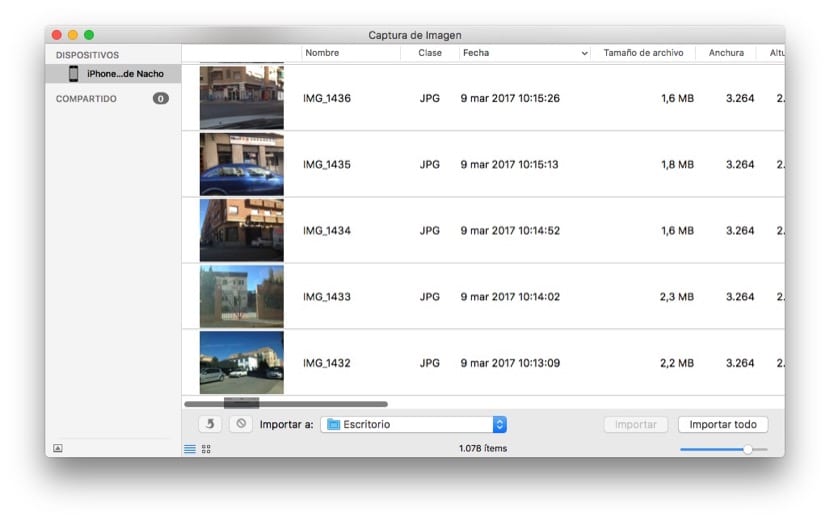
Once we run the application, we must wait a few seconds until our Mac recognize our device in order to access photos and videos that we have stored in it and thus be able to extract them. To do so we just have to select them and drag them to the folder where we want to save a copy of all of them.
As well we can select the destination directory and click on the Import all key, if what we want is to extract all the images and videos from our device. Once we have made the copy of the photos and videos, we can proceed to delete them directly or drag them directly to the trash on our Mac.
iTunes
Unfortunately iTunes is not designed so that we can extract the images from our device, something difficult to understand and that forces us to resort to third-party applications or somewhat more complicated methods, especially if we do not use a Mac. With iTunes the only thing we can do is save a backup copy of our entire device and later extracting the images with another application, a process that is too complicated since it requires installing an application specifically for that and that we will not mention in this article.
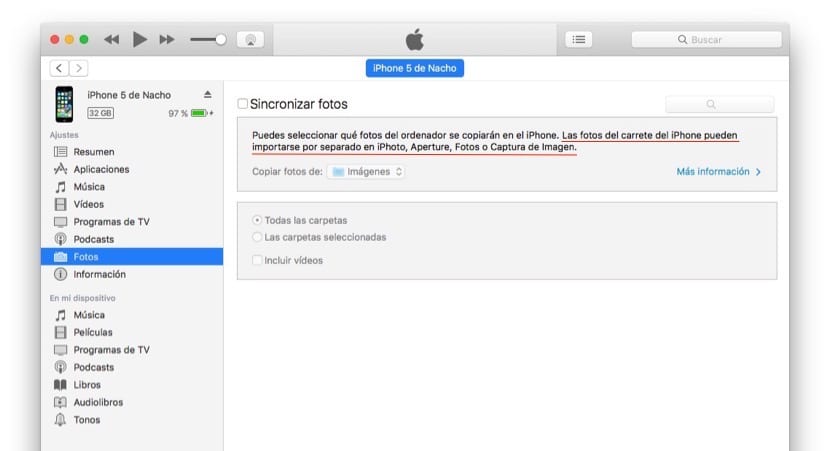
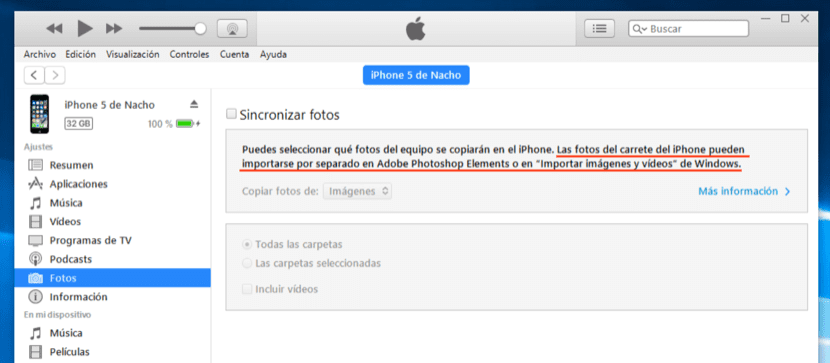
We can also use iFoto or Aperture, as itunes points out, but both apps are no longer supported by Apple, so we are not going to consider them in this article as available options. iTunes allows us to copy photos and videos from our Mac to the device. To do this, we just have to select the folders where the images that we want to transfer and synchronize the device are located.
iMazing
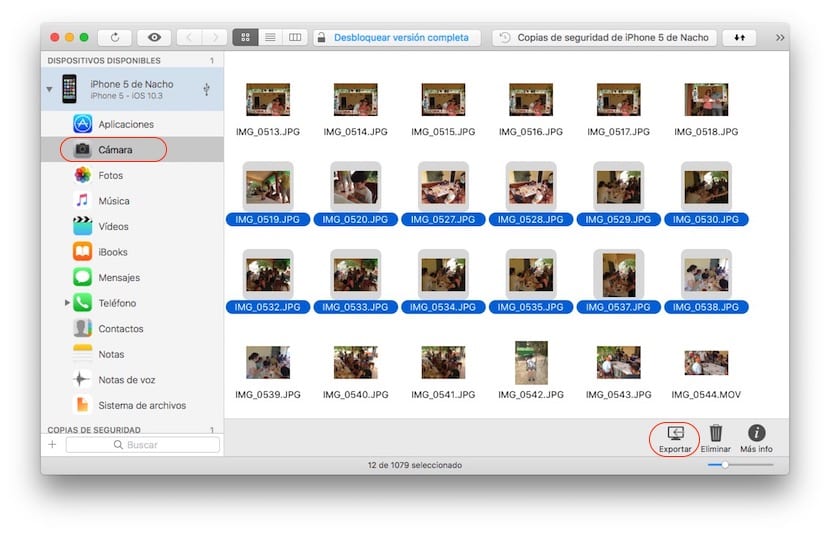
On previous occasions we have talked about iMazing, an alternative to iTunes with which we can not only extract our images, but also tWe can also add or delete books, music, notes in addition to carrying out different procedures with her. To be able to extract our favorite images or videos, we just have to connect our device to the Mac, install the application and go to our terminal, located in the right column.
Next, click on Camera so that it automatically the different albums that we have created begin to show. Double click on the album from which we want to extract the images, select them and click on Export, located in the lower right corner of the application.
Now we just have to select the directory where we want to store the photos and click on Choose. The selected images and videos will begin to download on our Mac.
Once we have exported the selected photos, we go to the lower right corner and click on Delete, to delete the images that we have copied to our Mac from the iPhone and thus be able to recover space on our device. iMazing is priced at € 39,99 and it is available for both PC and Mac. The trial version limits the number of photos and videos to import to 50 in each session, so you can download your film in several sessions with the trial version.
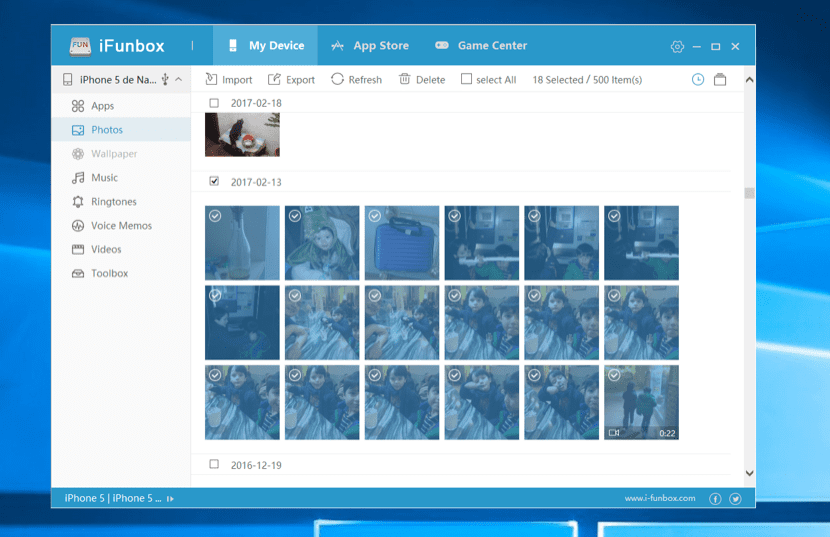
iFunbox
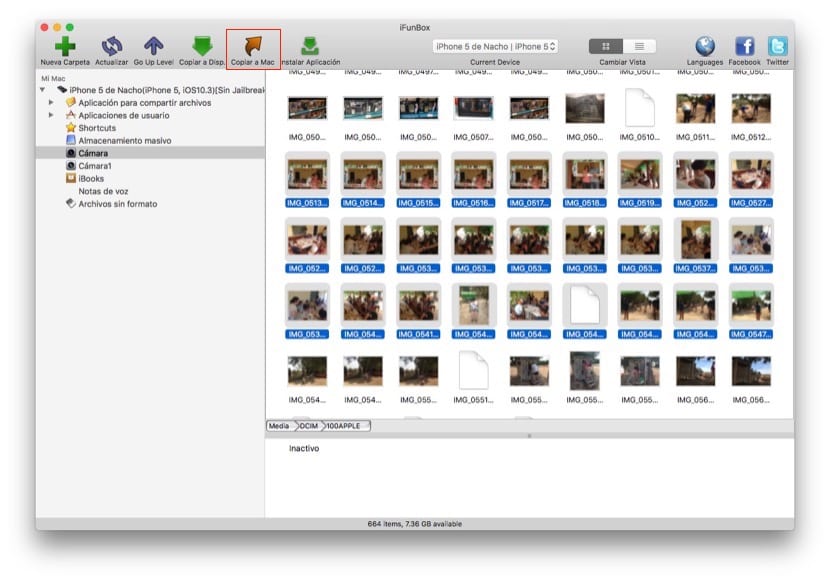
This application has always been related to jailbreak users, but it not only helps us to install or delete .ipa files. With iFunbox, a free application, we can, as with iMazing, extract all the images that we have stored on our device, quickly and easily. To do this, we just have to go to Camera and select all the images that we want to extract from our device. Then we go to the top menu and click on Copy to Mac.
Then we just have to select the directory where we want to save our photos and videos and click on Choose. To delete them, we just have to press fn + delete key and confirm the deletion of all the images that we have selected at that moment and that we should already have safely on our Mac.
iPhone Data Transfer - EaseUS MobiMover
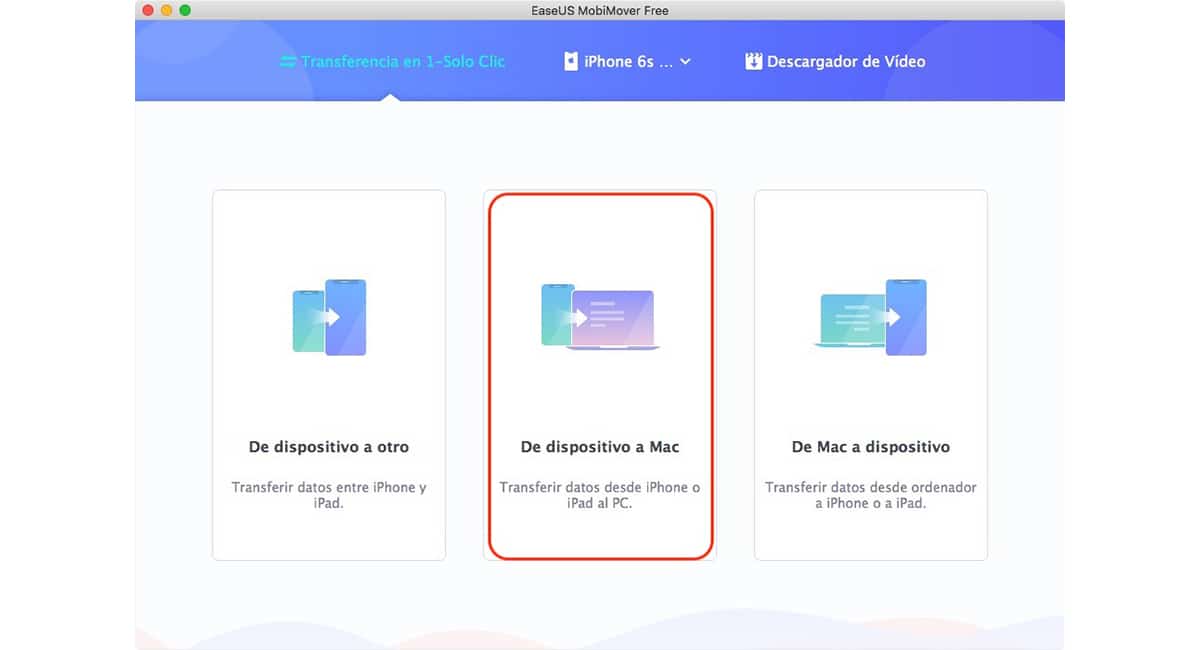
For alternatives it will not be, that is clear. Another application that allows us to completely do without iTunes when transferring photos from our iPhone to a computer, either PC or Mac, is iPhone Data Transfer, an application that allows us copy all the images stored on our iPhone, iPad or iPod touch to a PC or Mac in a very simple way.
With iPhone Data Transfer, we can not only extract the images from our device, but in addition, it also allows us to copy content to our iPhone, iPad or iPod touch from a PC or Mac in addition to transferring content from our computer to our device.
To transfer the photos from our iPhone to the PC or Mac, and be able to make a backup, we must select the option Device to Mac. Next, we must connect our iPhone, iPad or iPod touch to the computer so that it recognizes it and we can select it as a data source.
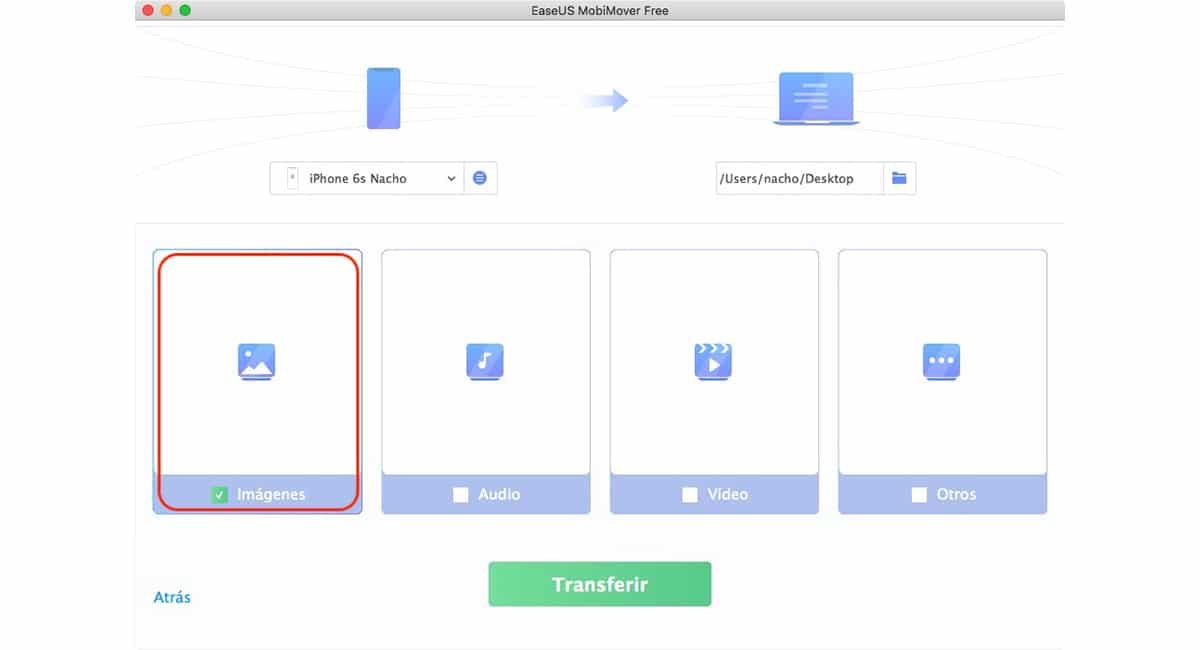
Next, we select the first option, Images and finally, we must select the destination folder where we want the images we want to extract from our iPhone to be copied. To start the process, we must press the Transfer key.
Depending on both the number of images and videos, and the size they occupy (especially the latter), the process may take more or less time, so if we haven't transferred our images to the PC in a long time, we can take it easy.
iPhone DataTransfer is available for Windows as well as Mac.
How to Transfer Photos from iPhone to Windows
When it comes to extracting all the images or videos that we have stored on our PC, if we are familiar with the Windows file system, it is likely that the simplest method is the one we have used all our lives to be able to consult and / or extract them. files that we have stored on an SD card, a USB stick, a digital camera, hard disk
iTunes
Unfortunately the iTunes application, with which we can manage which applications we install on our device, as well as videos, music, books and photographs does not allow us to extract the images in the Windows version, like the Mac version, so we are forced to resort to other unofficial alternatives. Of course, it is necessary that it be installed on our PC to be able to directly access the device to be able to extract the images by other means.
Traditional method
If we are used to the file system and for us copying and pasting files are the order of the day, the easiest method to extract images from our iPhone, iPad or iPod touch is through Windows file explorer. The only requirement to be able to obtain the images in this way is to have iTunes installed that you can download through the following link.
Once we have connected our device to the Windows PC, we go to the drive that will appear in My Computer. Next, we just have to navigate to the different folders, with names that do not tell us what their content may be, select all the images, cut them and paste them in the directory on our PC where we want to store them.
Keep in mind that every time we exceed 1.000 photos on our device, a new directory is created to store them, so we must check all the folders to make sure that we have extracted all the photographs that we would have taken with our iPhone, iPad or iPod touch.
Browsing the directories, we will also find images that we have received through messaging applications, images that are not in the same directory where the images or video that we make are saved, so if we do not want to lose them, it is convenient to include them in the extraction.
Import images and videos
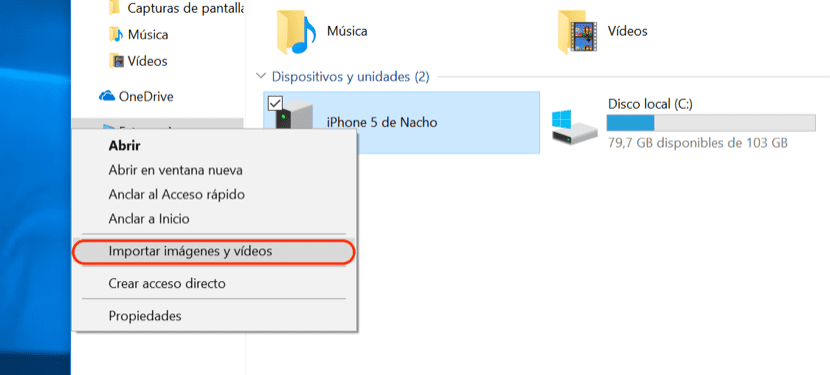
This is an option very similar to the one offered by the Capture Image application in macOS. This function not available through the menus, At least since the arrival of Windows 10, so to access it we just have to go to the unit that our device has created and click on the right mouse button and select Import images and videos.
- Then it will start read all the files and videos we have stored on the device and that can be copied to our Windows PC.
- In the next step we select the directory where we want to store our images and videoyes, but before clicking Next, we go to More options.
- Within this menu, we can select the format in which we want the photographs to be saved on our device. But, in addition, we can check the box Delete files from device after import so that automatically when the import is finished the videos and images are deleted from our iPhone, iPad or iPod touch.
- To finish the process, click on next and we wait for the process to finish.
iMazing

As in Mac, if we do not want to resort to the options offered by the operating system natively, such as in this case the traditional method of file management, we can make use of this application, an application that allows us to extract all the images of our device quickly and easily. To do this, we must connect our iPhone to the PC, open the application, select Camera in the right column to display all available images and videos. Next, click on export, located in the lower right corner and we go to the directory where we want to store them.
Once they are stored on our device, we can proceed to delete them directly from the application, through the option located in the lower right corner and which is called Delete. iMazing is priced at € 39,99
iFunbox
La iFunbox free application is the best alternative if we do not want to use paid applications to be able to download the content of our mobile device to the Windows PC, since it is also compatible with the Microsoft operating system, not only with the Mac. To proceed to download the content of images and videos that we have stored on our device, we will proceed in the same way as with iMazing, since, although the interface is different, the process is practically the same.
- Once we have downloaded and installed the application we connect our device.
- When the application recognizes it, it will show us in the right column all options to copy from or to device.
- Click on Photos / Photo so that all the images that we have on our iPhone, iPad and iPod touch are displayed, as well as the videos that we have recorded with our device.
- We select the images we want to download on our device and we go to the Export / Copy to PC button.
- Once they have been downloaded to our PC, we just have to click on the Delete / Delete button to delete all the photos from our device.
How to Transfer Photos from iPhone to Cloud
Although in most cases it is best to copy all our images to a PC or Mac to later store them on an external hard drive, not all users use a PC or Mac. For all those users, there is also a possibility and not It is another than to store all your images and videos in the cloud and when the files need to go to the used cloud and download their content. Actually The best service, in addition to free, available for this type of task is found in Google Photos, since it offers us unlimited storage space for photos with a resolution of less than 12 mpx and videos with Full HD resolution. Everything that exceeds there, we can store them, but the occupied space will be discounted from the one we have contracted.
Google Photos
Although it may seem strange that with an app we can have our favorite images at hand and get extra space on our device, it is so. Google Photos allows us to save a copy of all the videos and images that we capture with our iPhone in the cloud. When we are short of space, the application will offer us the possibility of deleting the images and videos that are already stored in the Google cloud.
Keep in mind that every time you connect to a Wi-Fi network (although you can also do it over 4G, although it is not recommended) Google Photos copies all images and videos that we have made to the cloud and that they were not in it, so the process of erasing our device is completely safe.
iCloud

For a couple of years, the Cupertino boys began to offer new storage plans, plans that go up to 2 TB and in which we can store practically everything, since it is no longer a storage service different from the usual ones, although it still has its peculiarities.
Amazon Cloud

All Amazon Premium customers have at their disposal an unlimited storage plan in the Amazon cloud, a service that allows us to store as many videos as images of our device we want in their original resolution and without having any other small print. If you are a user of this service, this option may be the most recommended for your space needs, whether they are specific or continuous over time.

I recently found a very useful program to manage iPhone photos - CopyTrans Photo!