
Since the arrival of Apple Music, many of us have switched to Apple's service and have had to transfer our entire music library to it. If going through all the albums and artists can be a laborious task, it is not that it takes too long, although it clearly depends on the size of your library. But what is a tremendous pain is having to go through the playlists, because they are usually composed of very varied artists of different styles and periods and that we have been developing over time. However now there is a very simple way to move Spotify or Rdio playlists to Apple Music, it works great and is really fast and simple thanks to MoveToAppleMusic.
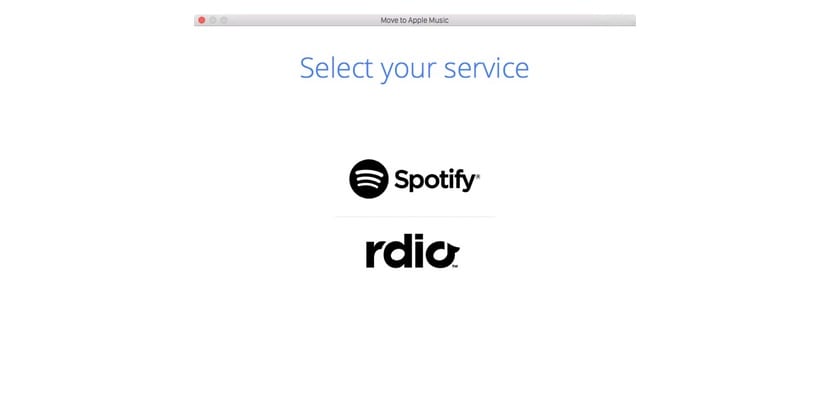
MoveToAppleMusic is a very simple application, exclusively for Mac OS X at the moment, which allows you to transfer your lists to Apple's music service. At the moment it is compatible with Spotify and Rdio, although future inclusions are not ruled out. Of course, it is a payment application ($ 4,99) that only accepts PayPal and there is no trial version. To download it you can access from this link to the official page.
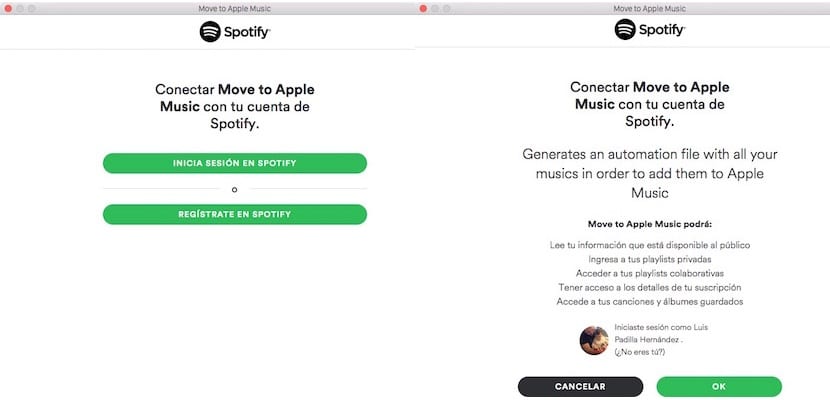
Once downloaded and installed you must enter your Spotify or Rdio account. The application uses the official APIs of both applications, so your keys are safe. You must also accept the application's access to your information.
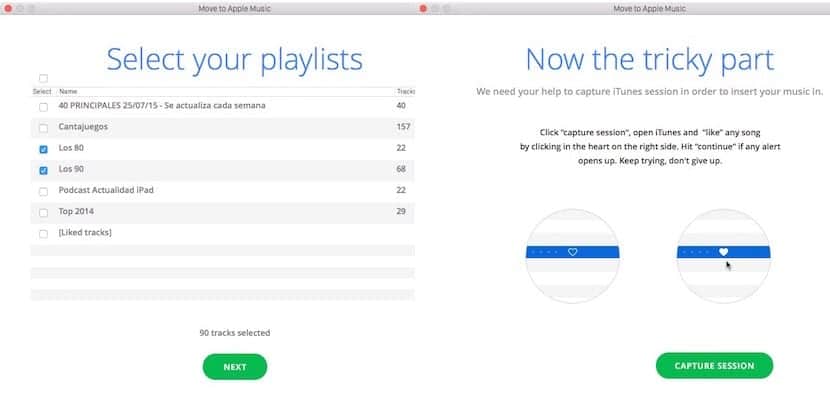
Once the entire entry process is done, the application will show you your lists, with the number of songs that each one contains. You can leave them all selected, as it appears by default, or just mark the ones that you really want to import to Apple Music. Once this is done, click on «Next» and prepare for the part of the procedure that is not automatic, but is very simple. Click on «Capture Session» and open iTunes, mark a song as a favorite (by clicking on the heart) and accepts the windows that appear (which are several). Once this is done, you will see that everything is correct because the MoveToAppleMusic window tells you so.
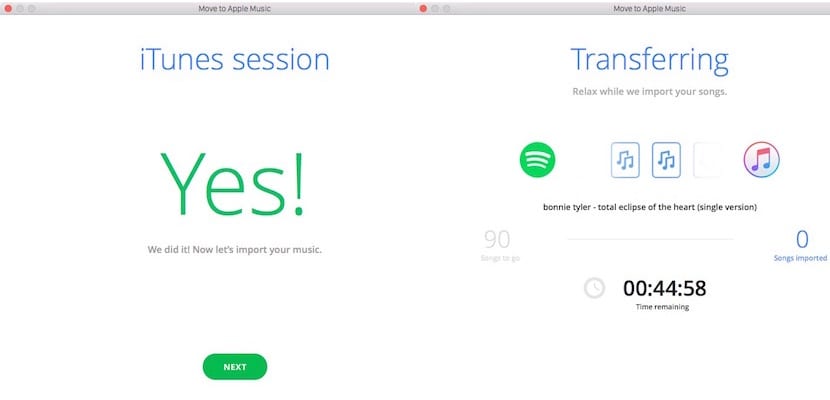
Click on Next and the transfer will begin, it is already an automatic process in which you do not need to intervene, and you can continue using your computer without the slightest problem. In the process he has left me out 12 songs, of which 10 are from the same album, but then I have been able to add them manually without problems.

Once finished, you can save your lists on your computer to later import them into iTunes. To do this, you must click on "Save My Playlist Files" and several text files will be saved, one for each list, in the location that you indicate. Just below you also have the list with the songs not found "Save the list of songs not found", so that you can search them without problems. To import the created "txt" files you must go to the iTunes menu> File> Library> Import playlist. An important detail: If your system is in a language other than English, which is most likely, you will have to change the language in the system settings to English for iTunes to recognize the import files. Once imported, you can convert it to Spanish again.
