Welcome to a new post in which We will show you how to fix your 2nd and 3rd generation iPad Home Button thanks to the guides of iFixit on how to repair the home button. This guide applies to iPad 2 and 3 Wi-Fi version and Wi-Fi + 3G version. But before starting I am going to give you some tips and warnings:
- This guide is only recommended if it is not fixed the home button with a recalibration
- It is recommended to carry out this guide on iPads in which the guarantee does not exist, since if we disassemble the iPad, the guarantee is invalidated;
- Notice that in some steps, changes a bit from iPad 2 with iPad 3, please follow the steps correctly
- IPad Update is not responsible for any damage to your iPad and everything listed below is taken from the iFixit guides.
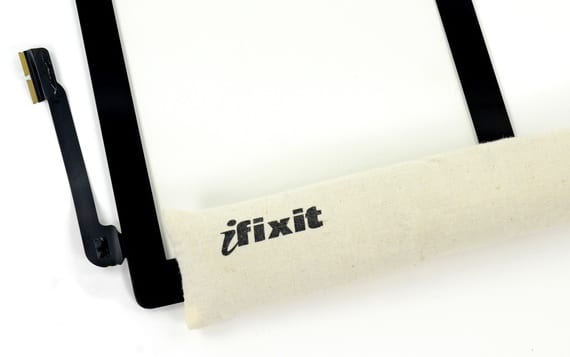
Let's start with what is necessary to carry out the repair, you can buy it from iFixit.
- iPad 2 and 3 Home button (required)
- iOpener
- iFixit Guitar Picks set of 6: They are picks (iPad 2)
- Phillips # 0 Screwdriver
- Phillips 00 Screwdriver (screwdriver)
- Plastic Opening Tools (iPad 2) They are plastic tools to open the iPad.
- Spudger (punch for electronics)
NOTICE: The iOpener cannot be heated many times in a row, you must allow 2 minutes between it cools down and reheats up.
Repair Home Button iPad 2 and 3 (Wifi and Wifi + 3G)
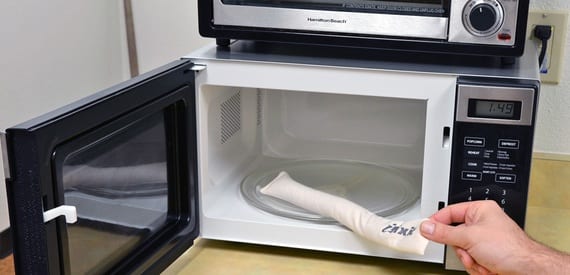
- We heat the iOpener at full power for one minute. The iOpener will serve to separate the adhesive tape around the iPad screen.

- We take the iOpener out of the microwave and place it in the right frame of our iPad for 90 seconds.

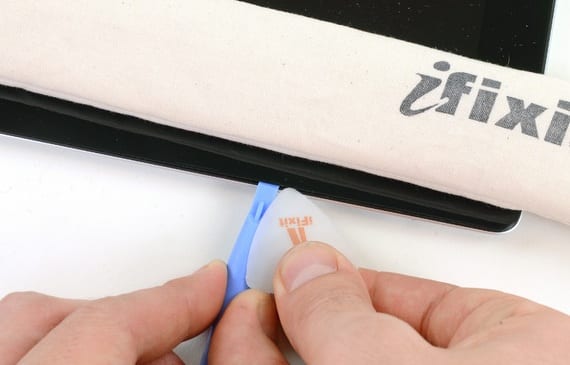
- We take one Plastic Opening Tools and put it in the upper right corner of the iPad about 5 centimeters from the top, where there is a small gap, we will take advantage of this gap to remove the touchpad. We make a movement until the screen gives way.

- Keeping the Plastic Opening Tool in the gap, we take an iFixit Guitar Pick (pick) and insert it next to the gap, next to the previous tool.
- We remove the Plastic Opening Tool (tool to open the iPad) and we put the iFixit Guitar about 0.1 centimeters more.
- We reheat the iOpener and place it on the bottom, where the Home button is located, in the same way as in step 1.
- While undoing the plastic with the iOpener, we move the iFixit Guitar (pick) along the right frame. We will have to do some small force, be careful, if the tool reaches the LCD panel we could fill the entire screen with adhesive and it would be uncomfortable when using the iPad.
- If we see that the iFixit Guitar (pick) does not move on the right side, we reheat the iOpener and we place it on the right side (after the bottom is heated).
- We place another iFixit Guitar on the bottom right of the iPad to prevent the adhesive from sticking again and we reheat the iOpener in the microwave and place it on top of the iPad, where the camera is.
- Be careful with the next steps since we are close to the Wi-Fi antenna and if we touch it it could be detrimental to this connection and we could not fix it.

- La iFixit Guitar (pick) that we had placed in the lower right part, we move it carefully through the lower part of the iPad. Do not slide the iFixit Guitar beyond the lower right corner, it could damage the Wi-Fi antenna, as I have told you before. When you are about 5 centimeters from the home button in the lower right corner, take out the iFixit Guitar leaving very little inside the iPad, this will prevent the Wi-Fi antenna from breaking.
- When we are close to the Home Button, we put the iFixit Guitar (pick) to the previous depth and move to the right without any fear, but with care of the Wi-Fi antenna. We go through the Home Button taking out the guitar pick and putting it back in and we are removing the adhesive from the lower left part of the iPad. If we see that the iFixit Guitar does not move, we reheat the iOpener and place it wherever we go.
- We leave the iFixit Guitar (pick) next to the Home Button, stuck pretty deep.
- Do you remember that we left an iFixit Guitar in the right frame? Well, we place another iFixit Guitar on top of the previous one in the right frame to go up to the top of the iPad and remove the adhesive from that place.
- We heat up the iOpener again and we place it in the part that remains: the left part.
- We move the iFixit Guitar (the pick) through the upper frame being careful with the camera (which we took out a little when we got to it, as when we did with the Wi-Fi antenna), if the adhesive hardens, we remove the iOpener from the part left and put it back on top for 90 seconds.
- We remove the iOpener from the left frame and move the iFixit Guitar along this left frame reaching the lower left corner of the iPad moving the pick to remove the adhesive. We leave the pick in the lower left part of the entire iPad, in the lower left part.
- Be careful with the cable that connects the two parts of the iPad, place the pick in the lower left part trying not to cut the cable. Work carefully, cutting that cable would be irreversible.

- We take the detached frame from the right side of the iPad and push back (with one hand in the lower right and one in the upper right). If any adhesive remains, cut it off with an iFixit Guitar.

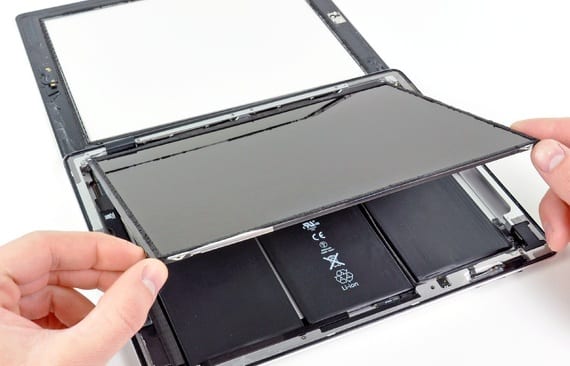
- We remove the screws that hold the LCD screen (indicated in the photograph) with our Phillips 00 Screwdriver (screwdriver)

- Very carefully and with the help of a awl (spudger), we move the part that indicates the photograph (as if it were a book) towards the frame that we have previously removed, be careful as a cable that exists can break.
- iPad 2: With a Plastic Opening Tool we flip the fixing tabs on the two ZIF sockets on the digitizing tape. Make sure you are prying up on the hinge holding tabs and not on the internal sockets themselves.

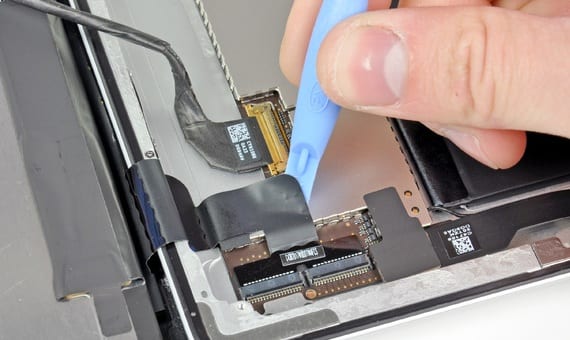
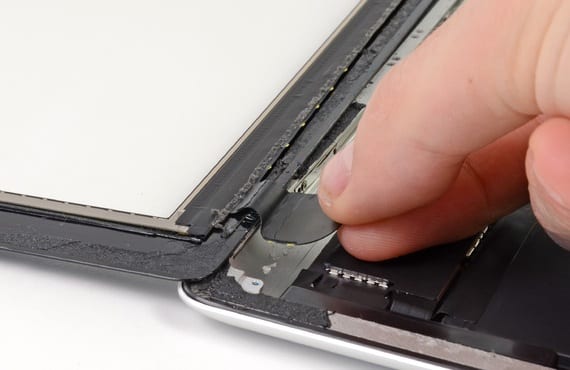
- iPad 3: With the tip of a spudger (punch), we peel off the adhesive tape that covers the connector of the LCD ribbon cable.

- iPad 2: We use the edge of a Plastic Opening Tool (iPad open tool) to strip the digitizer cable. Carefully pull out the digitizer cable on the right side.
- iPad 3: We raise the retention flap on the ZIF cable connector drawing of our LCD screen. With our fingers, we pull the cable.
- iPad 2: We pull the digitizer cable directly from your two sockets
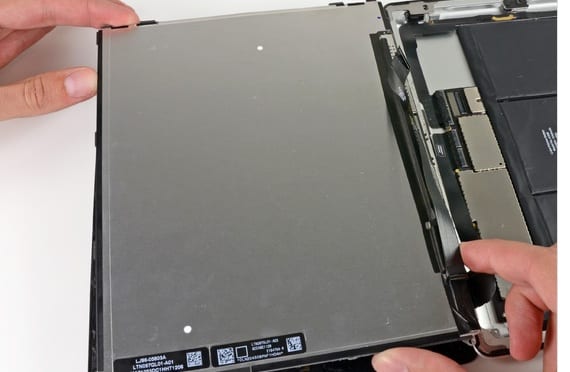
- iPad 3: Without touching the front of the screen, we raise the front panel to be able to work.

- iPad 2: We withdraw the front panel assembly. The cable that we have removed will have to slide when moving the screen. We lift the screen up by gently sliding the front panel away from the iPad. Be careful not to snag the digitizer cable on the display or back case.

- iPad 3: If necessary, qWe use the adhesive tape that holds the digitizer ribbon cable. We lift the retention flap of the ZIF tape of the digitizer cable.
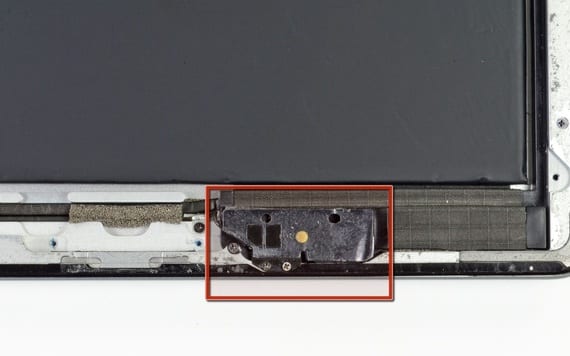
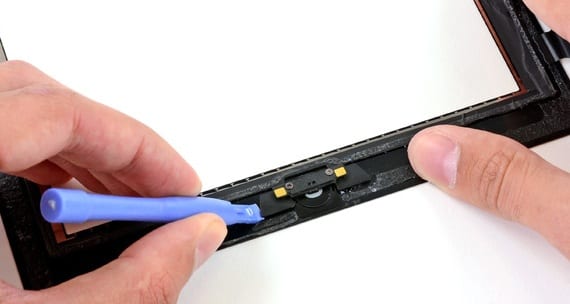
- iPad 2: In the part that we have removed, the front part, is the Home button, to facilitate replacement, we heat the iOpener in the microwave and we place at the bottom of the front frame to replace the Home Button.
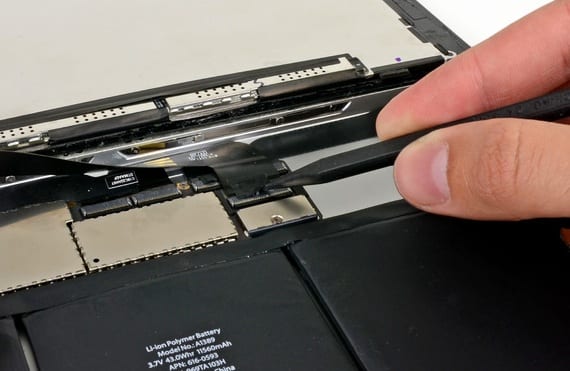
- iPad 3: With the spudger (awl) we loosen the adhesive below the digitizer ribbon cable. We pull the cable until it comes out of its internal sockets.

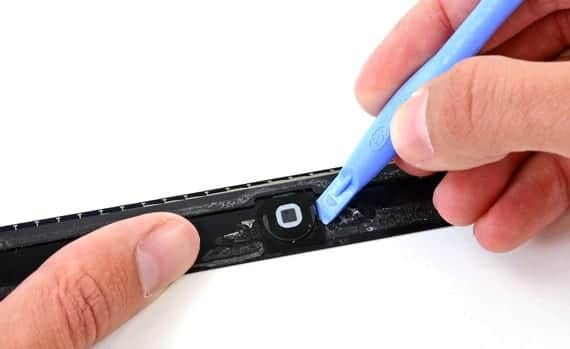
- iPad 2: With the Plastic Opening Tools We remove the adhesive from the right and left side of the Home button, lifting the tabs.

- iPad 3: With the punch again, we remove the digitizer cable back leaving the front of the iPad free. We remove the front panel.

- iPad 2: With the Plastic Opening Tools we remove the entire Home Button and we replace it with the one we bought and go back in the instructions to get back our iPad 2 with the Home Button replaced.

- iPad 3: In the part that we have removed, the front part, there is the Home Button, to facilitate replacement, we heat the iOpener in the microwave and put it on the bottom of the front frame to replace the Home Button.

- iPad 3: With the Plastic Opening Tools (tool to open the iPad) we remove the adhesive on the right and left side of the Home button, lifting the tabs.
- iPad 3: With the Plastic Opening Tools we remove the entire Home Button and replace it with the one we have purchased and we go back in the instructions to get back our iPad 2 with the Home Button replaced.


We remember that this guide has been translated and adapted with its own language from the official iFixit guide. Actualidad iPad is not responsible for any physical damage to your iPad.
More information - Home button: How do we calibrate it if it doesn't work? (I)
Source - iFixit (I) - iFixit (II)