
In an "Apple movement" of those that I did not understand at the time, those of Cupertino introduced Marking (Markup in the preliminary versions) with the arrival of iOS 9, but the function was only available, that I remember, from the app Mail. With the arrival of iOS 10, wisdom about this function reached the apple company and we can now use it from the Photos application to edit our images. In this post we will teach you how to access and how it works Dialing.
Before starting with this small guide I would like to say that using this function is very simple, especially for those of us who are already users of MacOS (formerly known as OS X). Dialing in macOS is available both in applications such as Mail and in Preview, an image viewer / editor that I use all the time when I'm working on my iMac.
How to access Dialing on iPhone or iPad
Personally, I would have preferred that the option was more integrated with the Photos app, that is, that it did not have to be accessed as if it were a third-party application, but this is a personal impression without any importance. To access Dialing on an iPhone or iPad we will have to do the following:
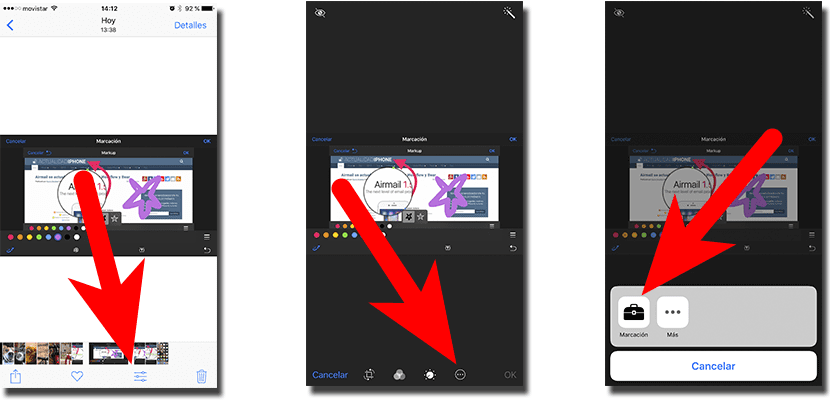
- The first step will be to open the Photos application.
- Next, we navigate between our photos and open the image that we want to edit by tapping on it.
- With the image already open, now we have to touch on the icon that looks like three switches of an equalizer.
- Next, and this is what I do not like (sorry), we touch on the circle with three dots inside, which will allow us to access third-party editors and the main function of this post.
- Finally, we touch on the toolbox that has the name of the function we are looking for underneath.
How to use Dialing on iPhone or iPad
Well, as I already mentioned, using this function is quite intuitive, but we will explain it anyway. Once we have the image open, we have accessed its editing options and finally Marking, we will see an image like the one at the top of this post (but without the magnifying glass and the arrow). We will have a total of 6 options:
Colour selection
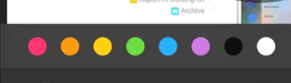
The first of the options is the simplest: the colored circles will allow us choose in which color we want to write or dial from pink, orange, yellow, green, blue, purple, black and white. This option has no more mystery.
Freehand drawing
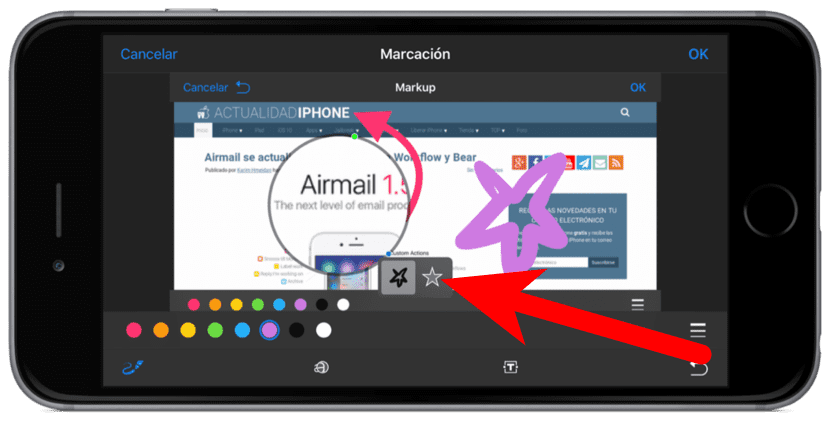
Although this would be the name of this option, it is actually much more than that. In the beginning, yes, we can freehand draw, which means that what we draw with our finger or Apple Pencil will be what is marked. But we would not be fair if we were to keep only this, since, for example, the arrow that you have in the header image has also been made with this option.
How? Very simple: whenever we want draw a perfect arrow, we will draw an arrow by hand. At that moment, two options will appear at the bottom of the image: one to create a perfect arrow and the other to leave the arrow as we have drawn it, that is, imperfect. This works with other figuressuch as squares, circles, speech bubbles, or even stars. If we want to draw any shape, it is best that we try to draw it and see if it offers us the option.
On the other hand, this option also distinguishes, if we have it configured in the phone or iPad settings, different pressures. This means that we will make a thicker or thinner line depending on the pressure applied.
Land
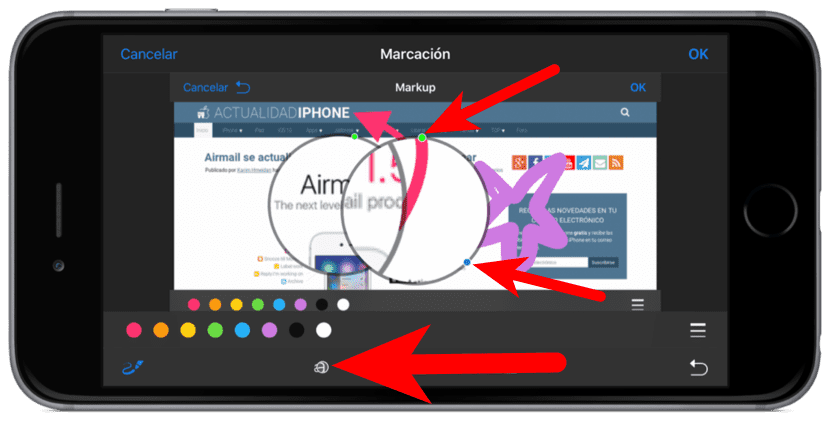
If we want something to be more visible than the rest, it is best to use a magnifying glass. The magnifying glass will be circular and it has two dots on it: the green dot will enlarge or reduce the image (the lens); the blue dot will enlarge or reduce the size of the magnifying glass (its circumference or area).
Text
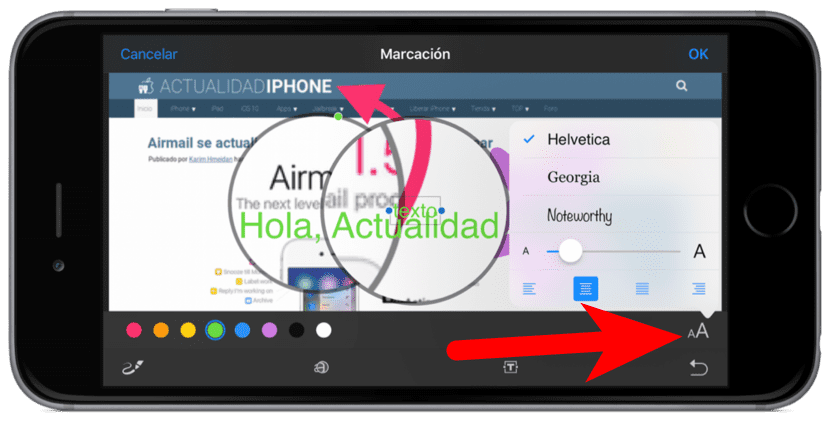
Marking too allows us to add some text. Once the designated button has been touched (the T inside the square), a text will appear with the word "Text". By tapping on it we can modify this word for any other text. If we touch on the icon on the right (the one with the two A's of different size), we can change the font type and other options.
Brush thickness

When we are going to use freehand, we can select the thickness of the line by tapping on the three lines on the right side.
Company
Personally, I don't use it much because I don't want to spread my signature around, but if we want to sign an image, we can do it by tapping on the icon on the right in the form of, effectively, a signature. Once the option is touched, we can create a signature or, if we had added it before in iOS or macOS, we can select our own signature that will be saved in iCloud.
Do you have any questions about how Dialing works in the Photos app of iOS 10?
Very good article. Things I did not know. Thanks