Sometimes we have the best devices, the best internet connection, and yet when we have to download content or watch it in streaming we realize that our internet speed is not what it should be, spoiling what should be simply perfect . Many times it is not a problem with our provider, or our devices, but a problem of saturation and interference. If we live in a place where there are many WiFi networks, which is quite common in cities, improving our WiFi connection can be something as simple as choose the best channel for your broadcast, which is the one that is least used, which takes us less than five minutes. We explain how to know which is the best channel and how to change it in our router.

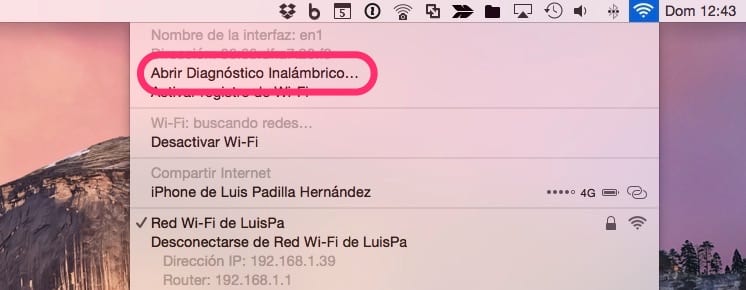
The first thing we need is an application that scans all WiFi networks and tells us which channels they use each of them. In Mac OS X the application is already installed on the system. It is as simple as holding down the Alt key on our keyboard and pressing the pointer on the WiFi icon on our top bar. We select the option «Open Wireless Diagnosis».

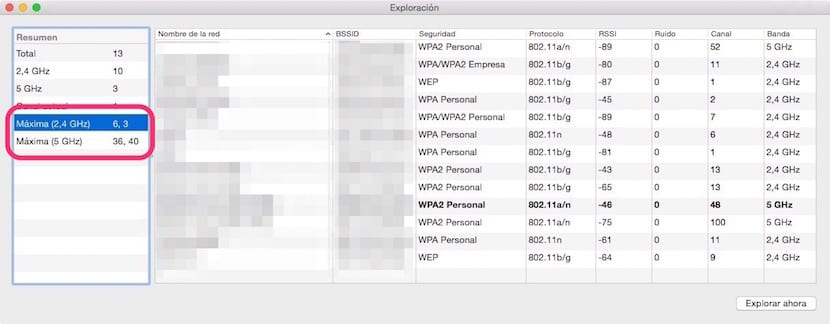
We click on «Continue», we introduce our password and then we leave the window to go to the menu bar, and in «Window» we choose the option «Explore». The window that is just above these lines will appear, with all the networks at our fingertips, and all the information about them. The important thing is in the part of the left, below, where it is They indicate the best channels for each of the available bands (2,4GHz and 5 GHz). Those channels of each band are the ones that we should use in our Router.

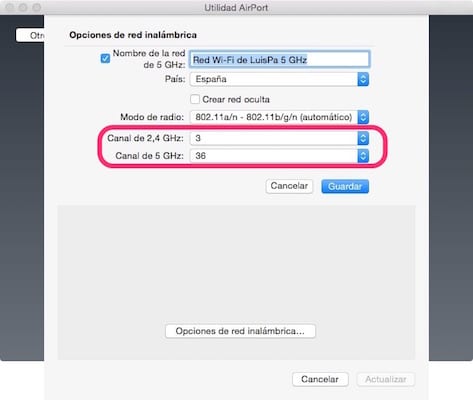
Now we must go to our router and change the broadcast channel, an option that is configurable in the vast majority of routers, even those provided by internet providers. Consult your router's manual to do so. In the example we will use an Airport Extreme, for which we must go to «Applications> Utilities> Airport Utility», select the router and click on the "Edit" button. We will then have to go to the "Wireless" tab and click on the "Wireless network options" button. Now we only have to select the channels that were previously indicated to us. Our router will restart and we will notice the improvement, if the connection problem was due to this, of course.
