
Notifications have always been one of the worst-managed issues in iOS, not only because they are not grouped but also when modifying the system settings to activate or deactivate them. Fortunately, those two problems have been fixed, at least half, with the new version of iOS.
And I say half, because the notifications, despite being grouped by application, a great advance (it must be said) lacks a few options to be able to interact directly with them without having to enter the application, but for something starts. Where iOS 12 has significantly improved is in terms of managing the notifications we receive.
With iOS 12, if we want to stop receiving notifications from an application, we do not need to enter the System Settings, although we can also do it, but from the notification itself, we can deactivate them completely or silence them. If we deactivate them completely, the application will not show us notifications again, but if we silence them, they appear on the terminal's lock screen but without reproducing the acoustic notification.
The problem with this option is that until the applications are updated, we cannot mute a group only instead all applications are muted. The problem will be to see when WhatsApp implements this function (we are still waiting for an application for the Apple Watch). However, the guys at Telegram are usually always the first to add the new functions that Apple introduces every day.
Manage notifications in iOS 12
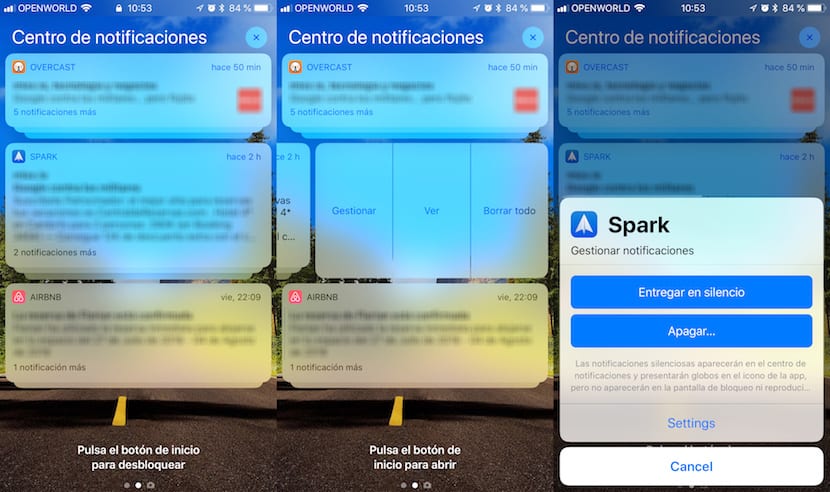
- If we want to stop receiving notifications on our iPhone once we have iOS 12 installed, we just have to swipe the app notification to the left.
- Next, 3 options will be displayed: Manage, View and Delete all. To manage notifications, we must click on Manage.
- Next, a new menu will be shown in which we can: Deliver silently (mute all notifications) and Delete (disable notifications).
If we deactivate notifications, to reactivate them, we must access Settings> Notifications and activate the switch of the application in question.
