
The coverage of any purchase, as well as that specific to Apple, Apple Care, does not cover the major cause of repairs, screen breakage.
A few days ago we have the option of change of screen of the iPhone 5s in the own Apple Store, but although we can have it in a short term, the price is great. If your screen has been broken and you want to replace it and save you a few euros here we will explain how.
The pieces
First you have to know what parts do you require for repair. You can buy only the panel by $ 29, full screen (panel and LCD) with camera by U.S. dollar 159,95 or full screen with the tools to get the job done for $ 149, etc.
Look at the options that meet your needs and proceed to purchase, we recommend iFixit as a source for these spare parts.
Remember Home button cannot be replaced with the screen since it is attached to a specific part of the A7 chip, if you change it for another will not have fingerprint recognition functions nor will the applications that used this feature be operational.
The procedure
About us iFixit ha publicado los pasos para la correct performance of this work, I will only translate it for those who do not understand English well.
Turn off the iPhone before you start disassembly.
1. Unscrew the screen
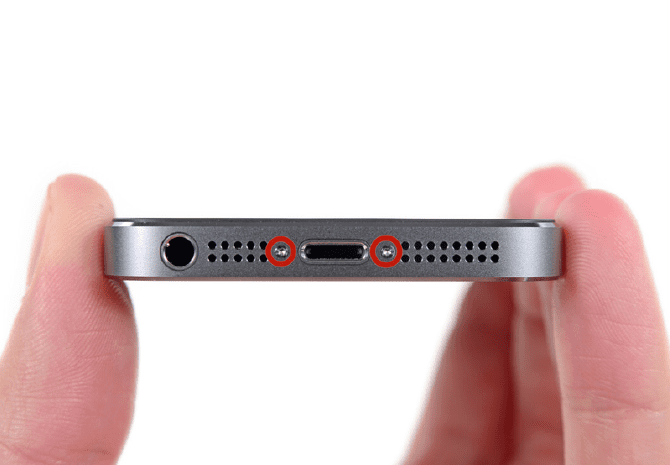
Remove the two 3.9mm Pentalobe screws located on the sides of the lightning. Remember that the pentalobe is a model of Apple's own screwdriver and whose figure is the following:

2. Set the screen suction
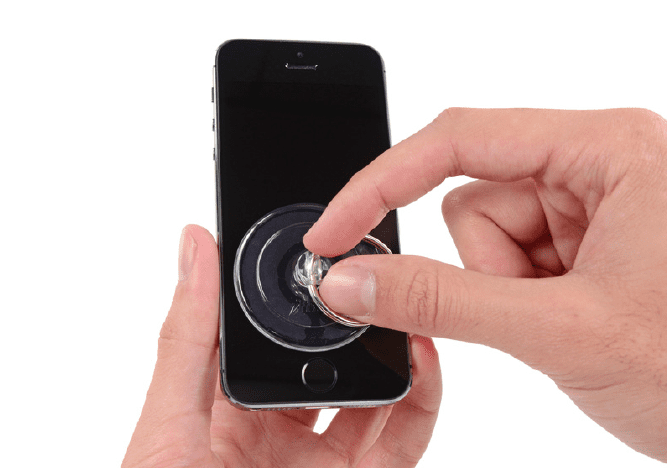
Use the suction cup to lift the front part. You will have to make sure that the suction cup covers the entire width of the screen, what remains completely hermetic and what is located just above the Home button.
3. Release the screen settings
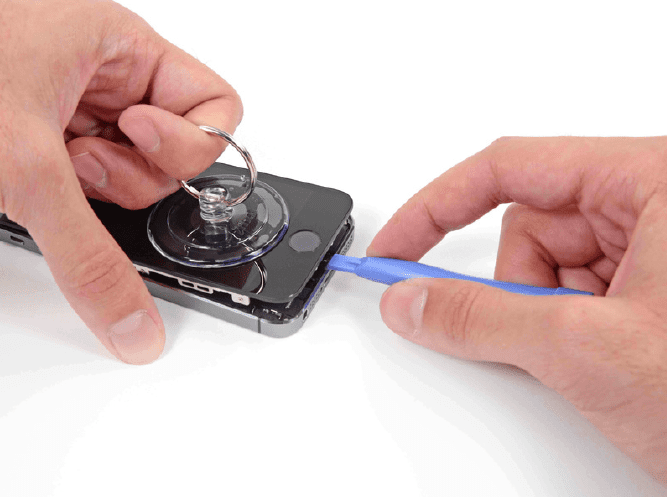
The front panel is attached to the iPhone using small clips. The goal is to open the phone enough to ir releasing each setting with a flat, plastic tool (important that it is plastic), it is simply to push them in.
Take your time, the screen is too tight and it is important that the pressure you apply to release all settings is always the same.
4. Remove the suction cup
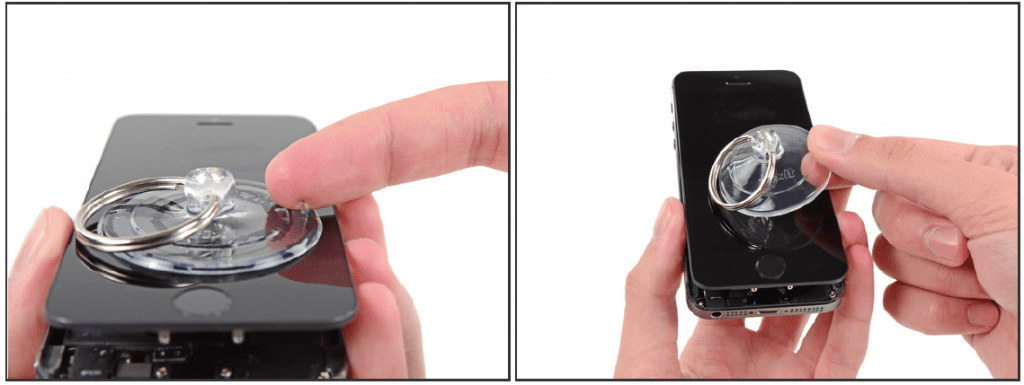
Without having completely separated the front panel of the iPhone, we will notice that there are still cables connecting both pieces. It's time to remove the suction cup in order to continue working on these remaining connections.
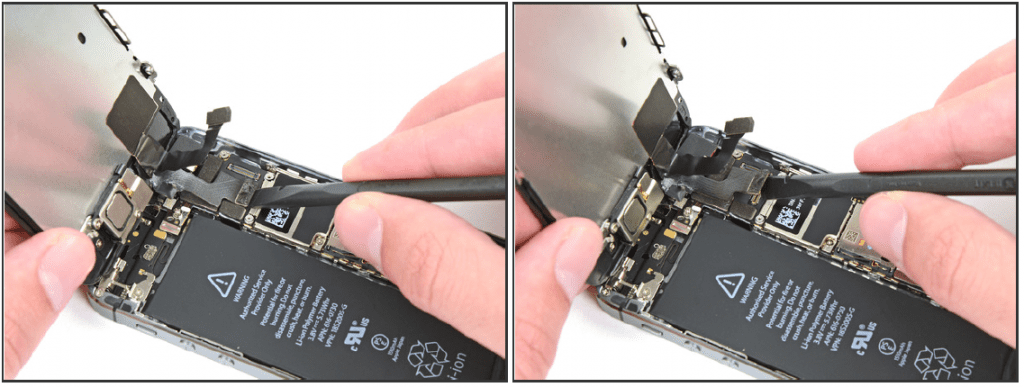
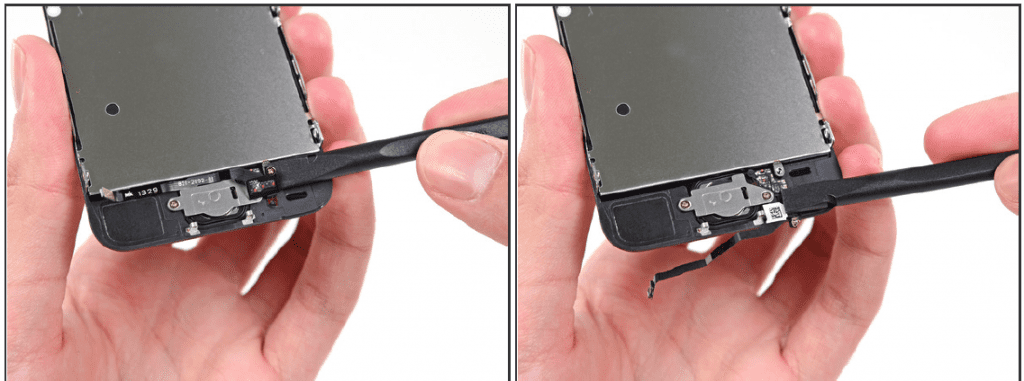
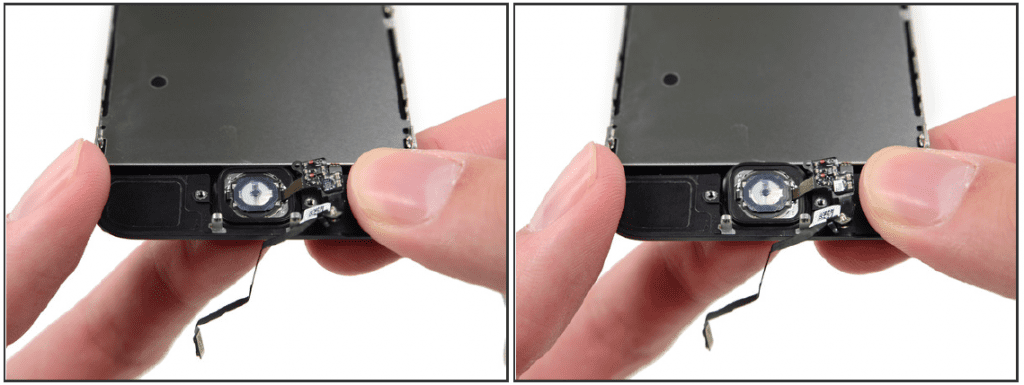
5. The Home button

Open the terminal just enough to see the metal bracket that covers the Home button cable. Be careful, open wide or you will damage the cable And this is vital if you want to keep Touch ID operational. Use the tip of a spudger to push the bracket and remove it with tweezers.
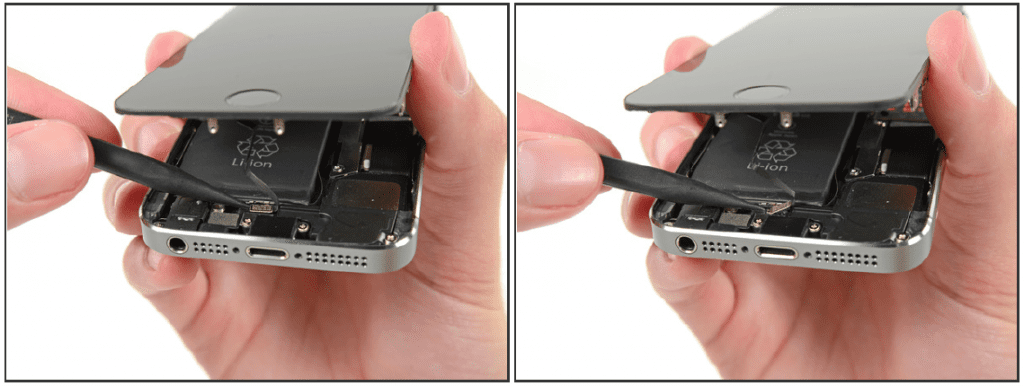
Use the tip of the spudger to lift and remove the home button cable from its socket. Be careful to make sure you are detaching the connector from the base of the cable and not prying over the entire socket, which has its own cable and can lead us to error.
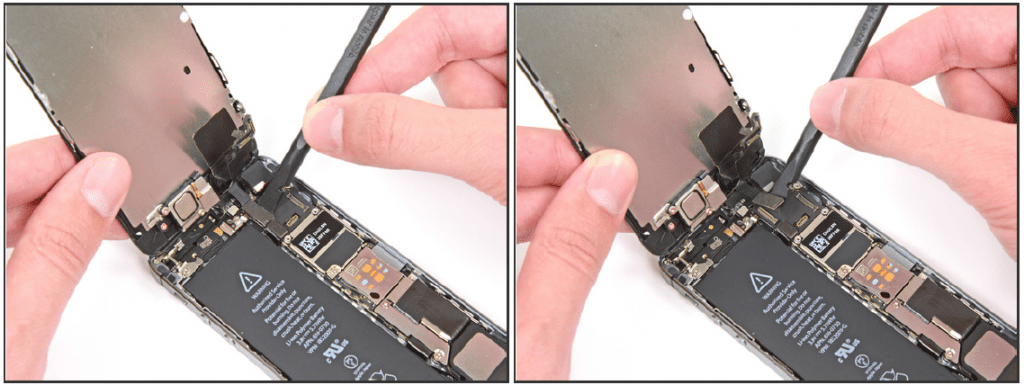
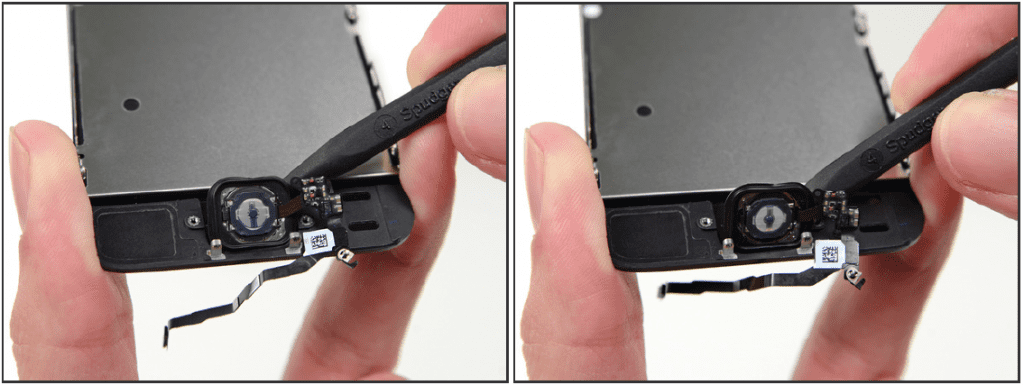
6. Open the screen
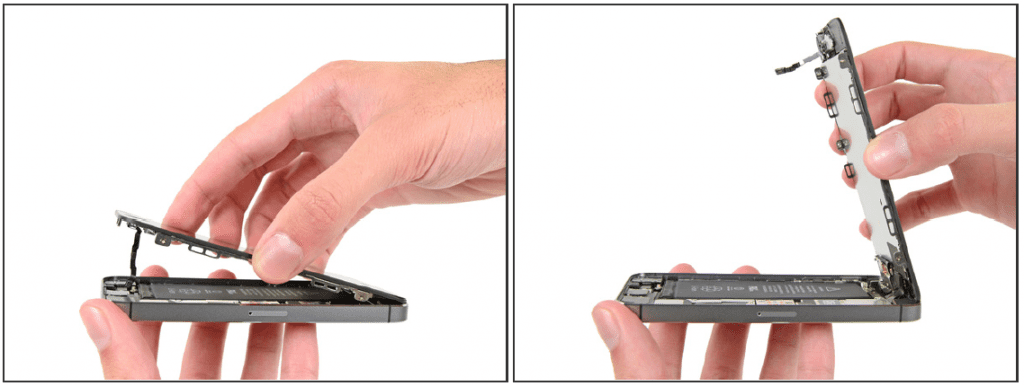
Once you the connector is free, pull the ends of the start button using the top of the terminal as a hinge.
During the following steps and until the entire front panel is released, you will need to holdr the screen at a 90 degree angle with the rest of the device.
7. Access the logic board

Remove the following screws that give access to the logic board:
- Two 000mm Phillips # 1.2 screws (Red)
- One 000mm Phillips # 1.3 screw (Orange)
- Another 000mm Phillips # 1.3 screw but watch out for this one that is not magnetized and may fall off and get lost (Yellow)
Withdraw the panel.
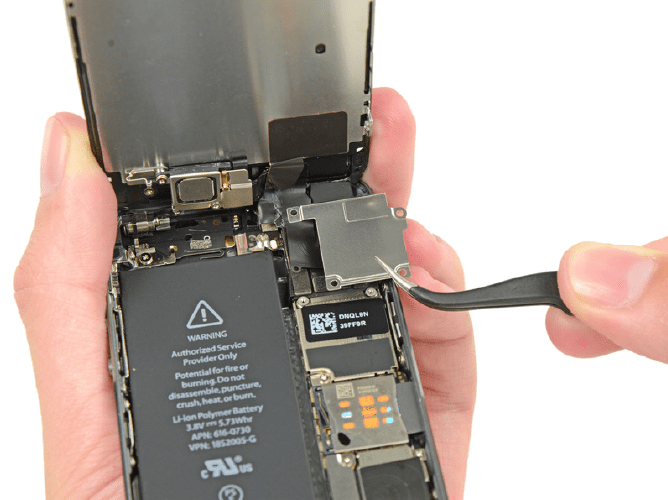
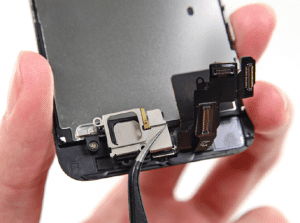
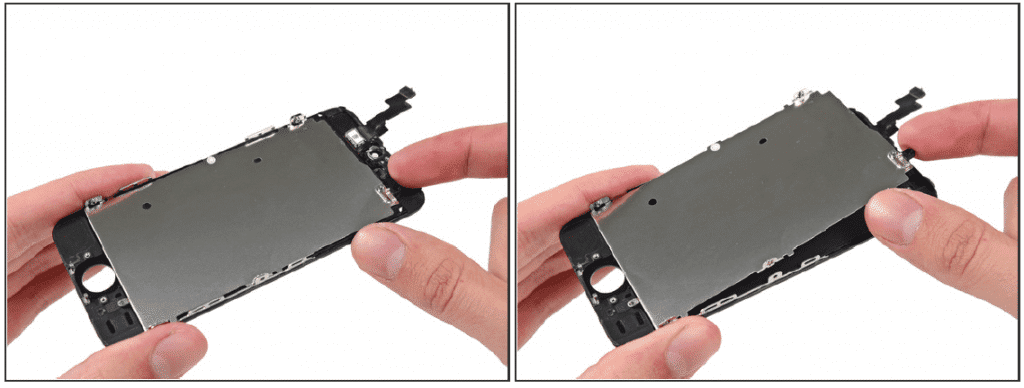
7. Disconnect the front camera
Use the flat end of a spudger to disconnect the front camera and sensor.
While holding the front panel disconnect the cable.
Lastly, disconnect the cable from the LCD. And you can now separate the screen from the rest.

8. Headset

Remove the marked screws:
- One 000mm Phillips # 4.0 screw (Red)
- One 000mm Phillips # 2.3 screw (Orange)
It is very important that when mounting afterwards we put the screws exactly in this order since if we exchange them we can cause serious damage to the LCD.

Use the tip of a spudger to remove the left leg from the stand out and with the tweezers, release the piece.
Now you can remove it allowing access to the speaker.

Remove the speaker with tweezers, If you do it with your fingers, you can leave fat that later generates a malfunction.
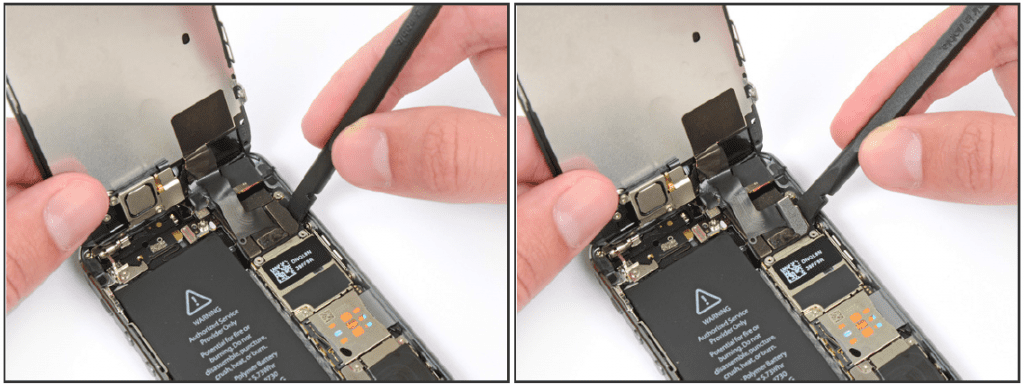
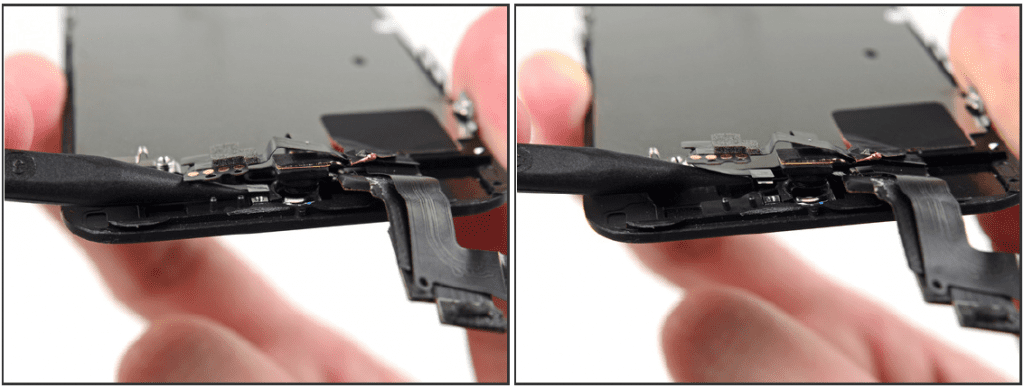
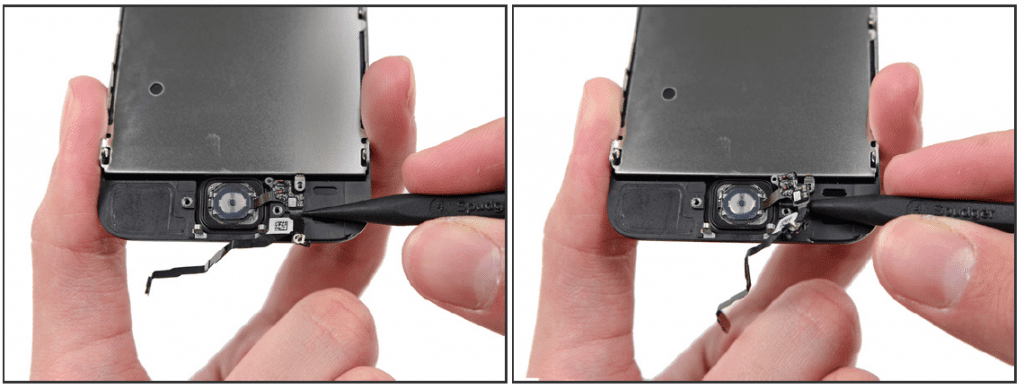
9. Front camera
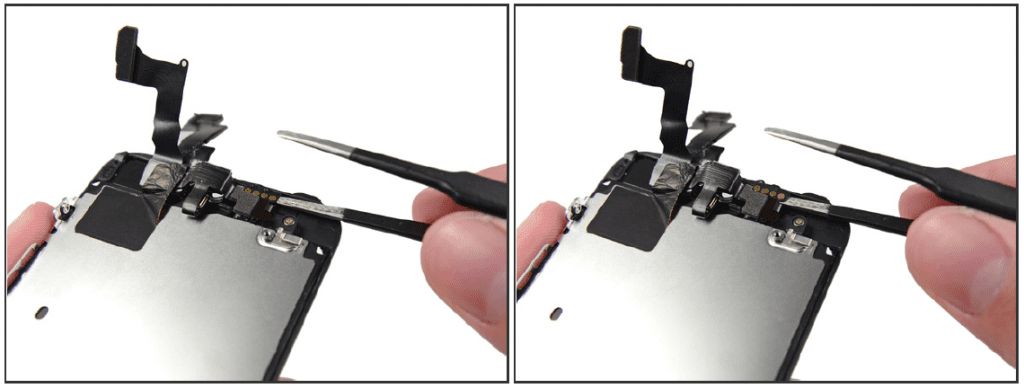
With the edge of a set of tweezers or a metal spudger, Gently lift the speaker wire and earpiece until these parts separate and allow space to insert the spudger to pry and separate both from the panel. These pieces are attached with an adhesive, so you apply just the right force.
Pry directly below the earpiece speaker contactsas there are sensors that can be damaged in other positions.
Use the tip of a spudger to lift the ambient light sensor out of position in the display assembly.
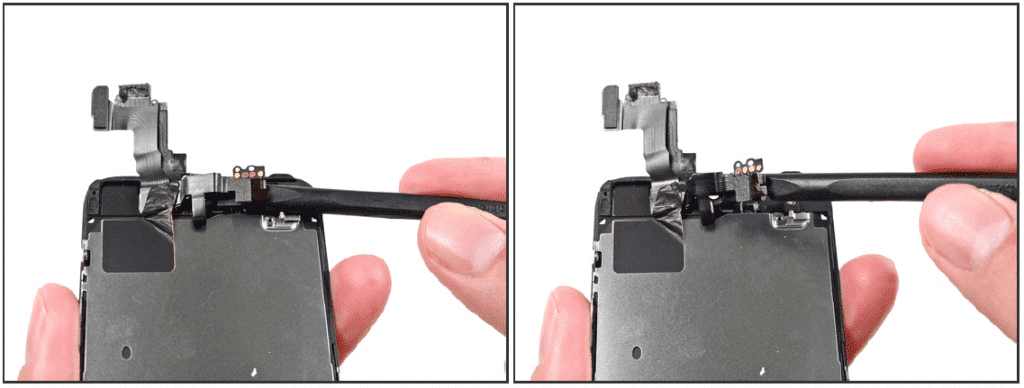
Use the flat end of a spudger to Gently separate the front camera part and the cable away from the display assembly.
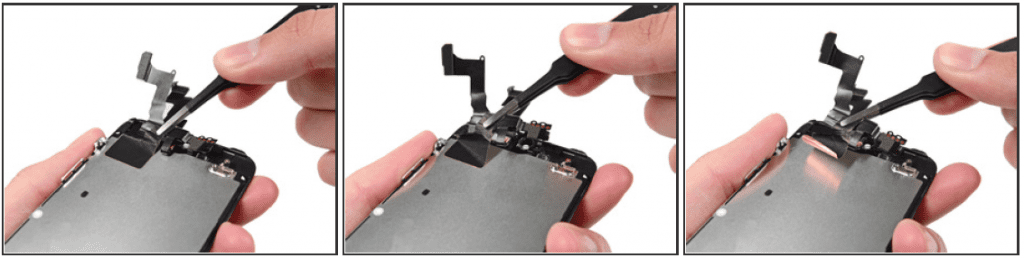
Carefully remove the cable assembly off the liquid crystal protection plate to remove it from the screen.
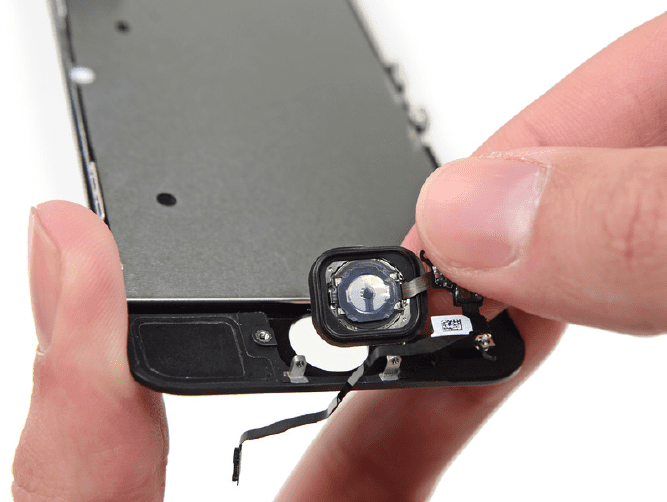
10. Home button release
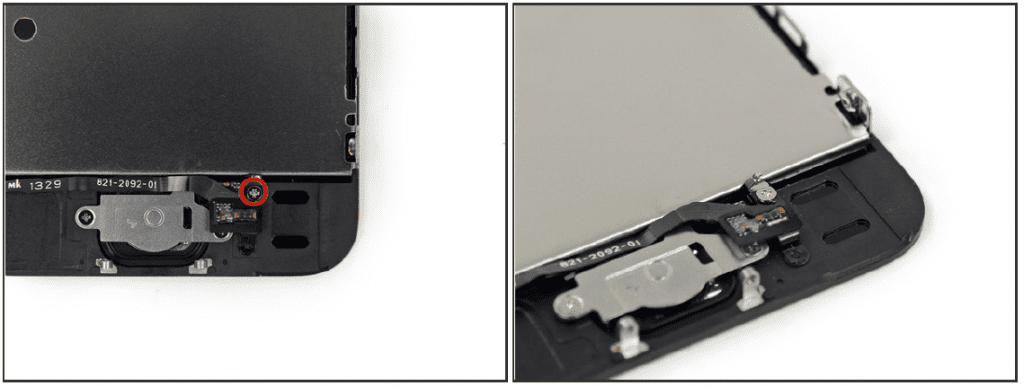
Unscrew the single Phillips # 000 screw that holds the cable the start button. The clamping screw holds the cable by means of an elastic support. During reassembly, make sure the contact is in the correct orientation, that is, on the side of the screw closest to the LCD.
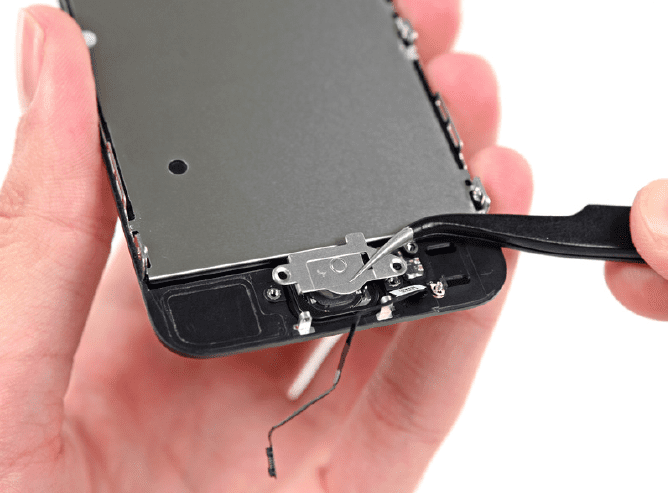
Bend the cable the home button down to the side of the bracket.
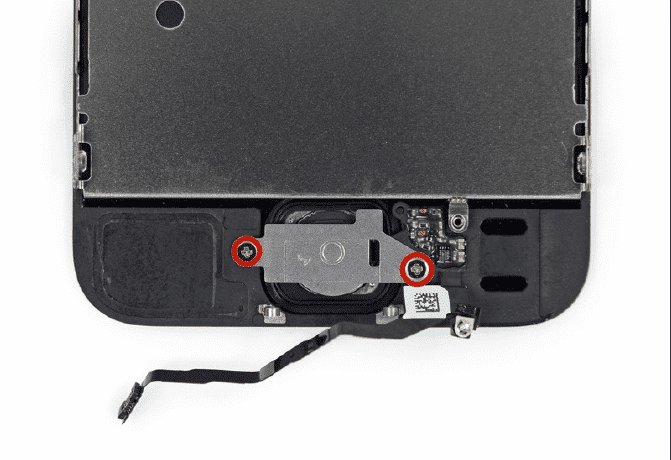
Unscrew the two 000mm Phillips # 1.4 screws of the home button bracket.
Remove the bracket.
Use the tip of a spudger to remove the home button cable from the back box.
Completely remove the home button prying gently with a spudger. Until complete extraction.
11. LCD and panel separation
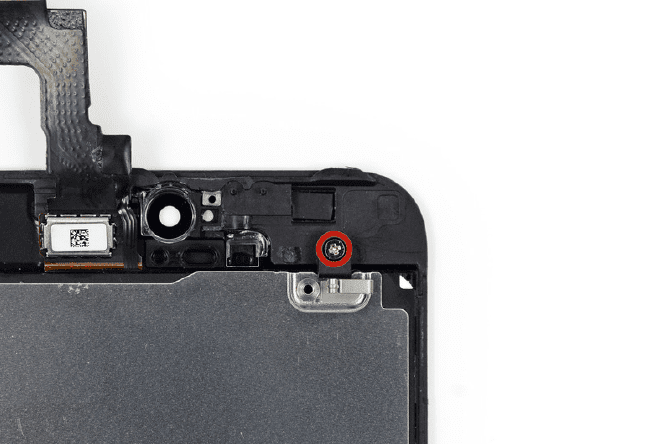
Remove the 000mm Phillips # 2,7 screw from the back of the display assembly.

Remove the two 1,2mm Phillips screws on each side of the LCD screen (four total), it may be helpful to first loosen all four screws slightly before removing any completely.
You can separate both parts.
Mounting
For the assembly follow the steps in reverse.
Visual
We can see the next video if we have any questions.
Excellent
Thank you
Say that Apple does not distribute original parts to any supplier, if that change is made instead of a price in exchange that is what Apple offers you, you lose the right to that special price either for screen or terminal replacement, taking into account Take into account the price of the device, I would not play it with screens of dubious quality… You have to remember that nobody gives anything away….
Obviously, the case is to have options and to be able to decide if you want Apple to charge you a kidney to have a guarantee of that piece for another year, but remember that the rest is still without guarantee, or you take a risk and do it yourself.
I have changed the odd part of an iPhone 4S and I am glad I did because I saved a lot of money ... it depends on the circumstances of each one.
Thanks for your comment !
Another issue that is not mentioned is the quality of the components supplied by third parties, as none guarantee the resolution and quality of apple. Those of us who use iPhones do so for quality and not for price.
Thank you.
I forgot.
It is not obvious that people know that Apple does not supply spare parts to suppliers, some even say that they are original.
It would be nice to say ...
Parts from non-SAT Apple companies do not supply genuine parts.
Saying things as they are does not hurt the article even if it is a translation.
Greetings and thanks again.
true I also bought mine on a website that said original iphone full screen and the screen looks exactly the same as the other one, I don't see any difference.
30 euros for ebay the LCD, digitizer and glass, then you change the elements of the site (speaker, camera, etc ...) and I regret to disagree with the home button, if you load the button nothing happens, but if you screw up the integrated circuit of the Touch ID that comes from behind you will not be able to use fingerprint recognition anymore.
Good tip, thank you !!